
The Red Keycard is the highest clearance card in Rust, and the only thing standing between you and the best loot rooms in the game. Military Tunnels, Launch Site, Large Oil Rig, Missile Silo: every one of them ends at a door that will not open without one. Get it right and you walk out with elite crates full of AKs, C4 and Tier 3 blueprints. Get it wrong and you burn an hour of your wipe for nothing.
Here is the part most players learn the hard way: you cannot buy a Red Keycard, you cannot craft one, and the card itself only survives two swipes. This guide covers exactly where red cards spawn, every door that accepts one, the full run kit, and the mistakes that quietly waste them.
- What It Is
- Where to Get One
- The Keycard Chain
- Where to Use It
- Monument Walkthroughs
- Swipes & Durability
- The Loot
- The Run Kit
- Myths & Mistakes
- Pro Tips
- FAQ
What Is the Red Keycard in Rust?
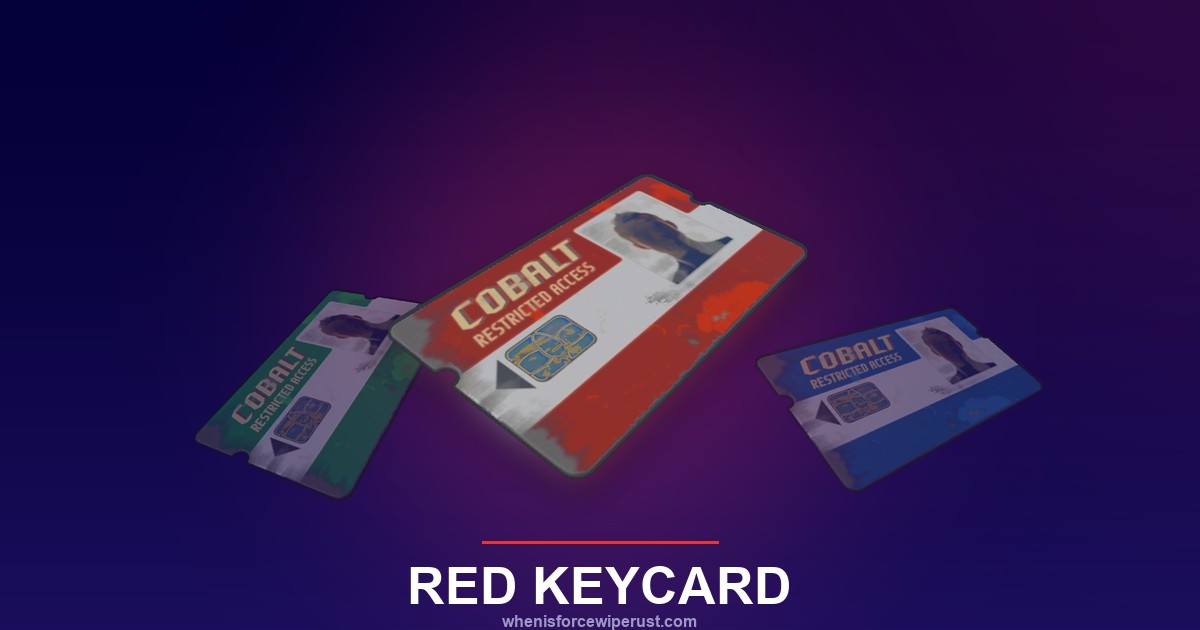
The Red Keycard is the top tier of Rust’s three keycard system. Green is the entry level, blue is the mid tier, and red is the one that opens what the game files politely describe as top level areas. It is a Cobalt branded plastic card that sits in your inventory, stacks to one, and despawns an hour after it hits the ground.
Unlike most Rust progression, keycards are not a blueprint you learn. There is no research table shortcut and no workbench recipe. Every red card in the game was pulled out of a monument by somebody who solved a blue puzzle first, which is why they hold their value all wipe long and why players will trade real loot for a spare.
Mechanically the card does one thing: you hold E on a card reader next to a locked door, the reader eats a swipe, and the door opens for a few seconds. That is it. The complexity is not in the card, it is in everything you have to do before the reader will even accept it.
Where to Get a Red Keycard in Rust
There are five monuments with a guaranteed Red Keycard spawn, and every one of them puts it behind a blue card door. That is the single most important fact in this guide. You do not find red cards lying on desks in the small monuments. You trade a blue card for one.
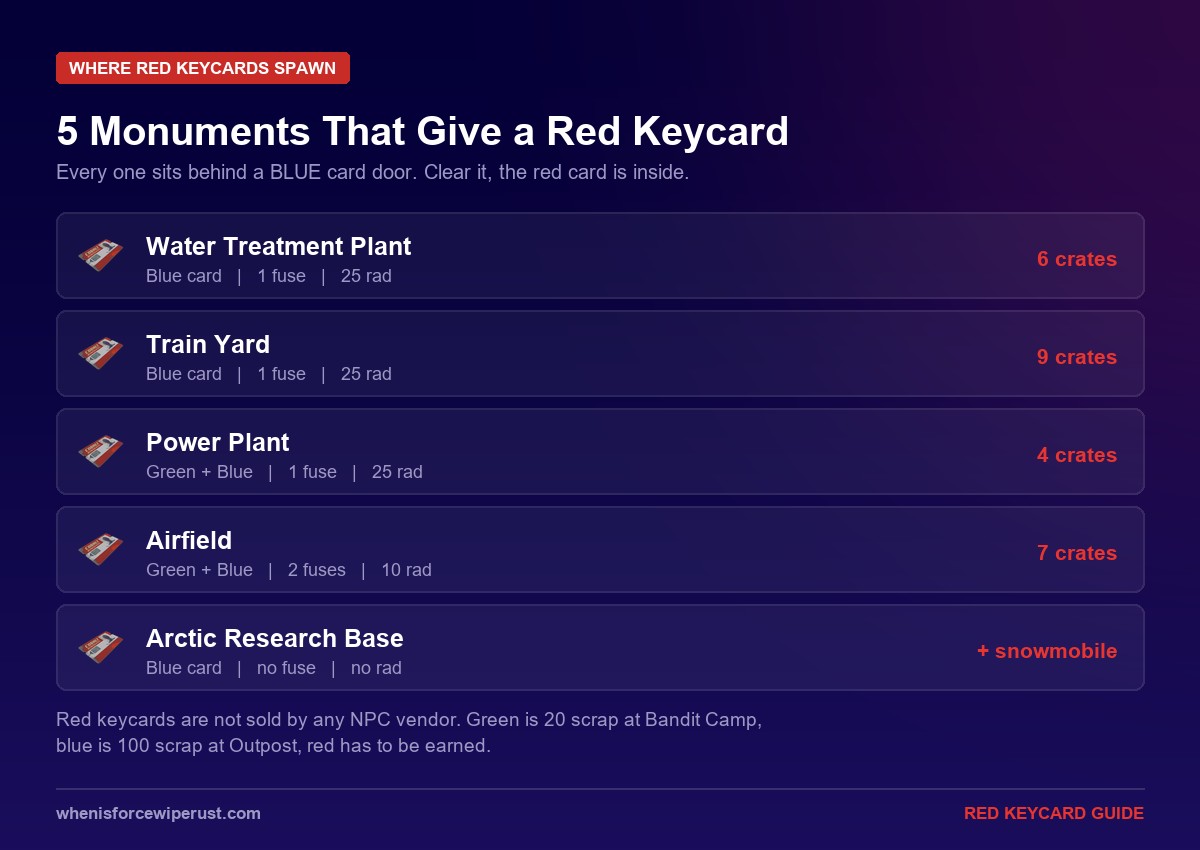
| Monument | Cards Needed | Fuses | Rad Protection | Behind the Blue Door |
|---|---|---|---|---|
| Water Treatment Plant Easiest | Blue | 1 | 25 | 6 crates + Red Keycard |
| Train Yard Best value | Blue | 1 | 25 | 9 crates + Red Keycard |
| Power Plant | Green + Blue | 1 | 25 | 4 crates + Red Keycard |
| Airfield | Green + Blue | 2 | 10 | 7 crates + Red Keycard |
| Arctic Research Base | Blue | None | 10 | Red Keycard + a snowmobile |
Train Yard is the best raw value. One blue card and one fuse gets you nine crates plus the red card, with no green card in the chain. If you only have time for one run before the server pops off, this is the one.
Arctic Research Base is the cheapest. No fuse, barely any radiation (it peaks at 11), no green card. You swipe blue on one garage, take the red card off the box at the back, then swipe blue on the other garage and drive off with a snowmobile. Full walkthrough in our Arctic Research Base guide. The catch is that it only spawns on maps with an arctic biome, and it is usually a long walk from anywhere useful.
The Keycard Chain: Green to Blue to Red
You cannot skip a tier. The system is a ladder, and every rung costs something.
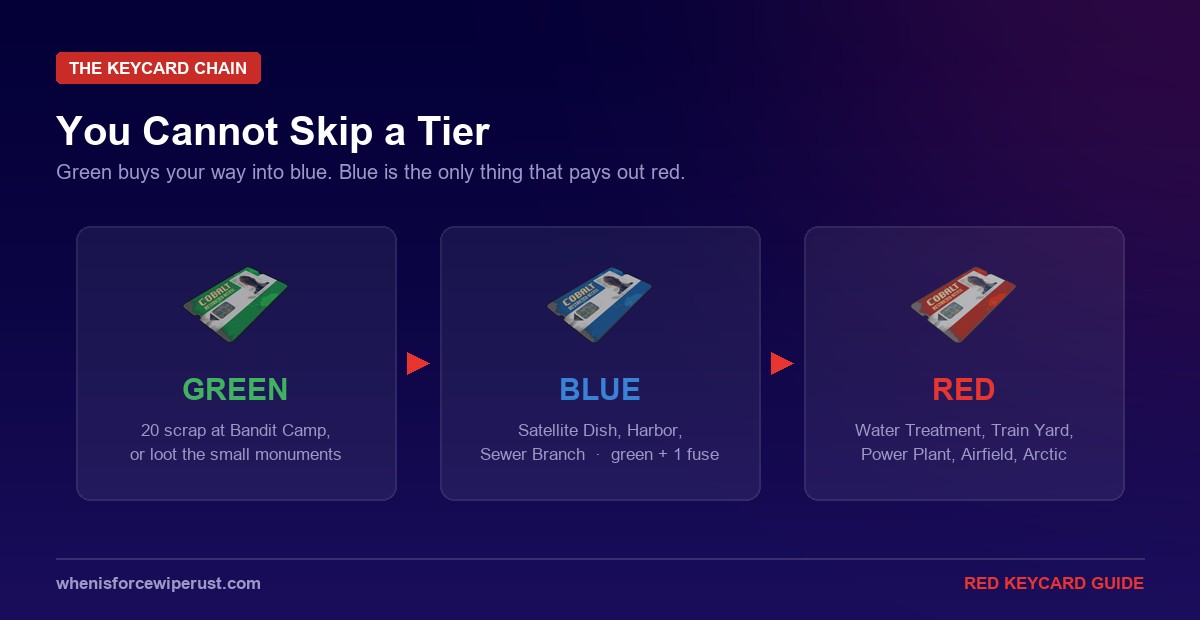
Green Keycard. The cheap one. You can buy it at Bandit Camp for 20 scrap, which is the fastest route by a mile, or loot one from the supermarket back office, the gas station office, the abandoned cabin upstairs, or the Junkyard bridge office. Roaming scientists drop them too.
Blue Keycard. The bottleneck. You get one by solving a green card puzzle at Satellite Dish, Harbor or Sewer Branch, each of which needs a green card plus one fuse. You can also buy a blue card at Outpost for 100 scrap, pull one off Oil Rig scientists, or very occasionally catch one gutting fish.
Red Keycard. The payoff. Spend the blue card at any of the five monuments in the table above.
Priced end to end, the fastest legitimate path to a red card is roughly: 20 scrap for a green at Bandit Camp, one fuse, a Sewer Branch or Satellite Dish run for the blue, one more fuse, then a Water Treatment or Train Yard run for the red. Two fuses and 20 scrap, plus the walking. If you would rather pay scrap than run puzzles, 100 scrap for a blue at Outpost skips the middle step entirely.
Where to Use the Red Keycard
Red card doors exist at five places. This is where the card actually gets spent.
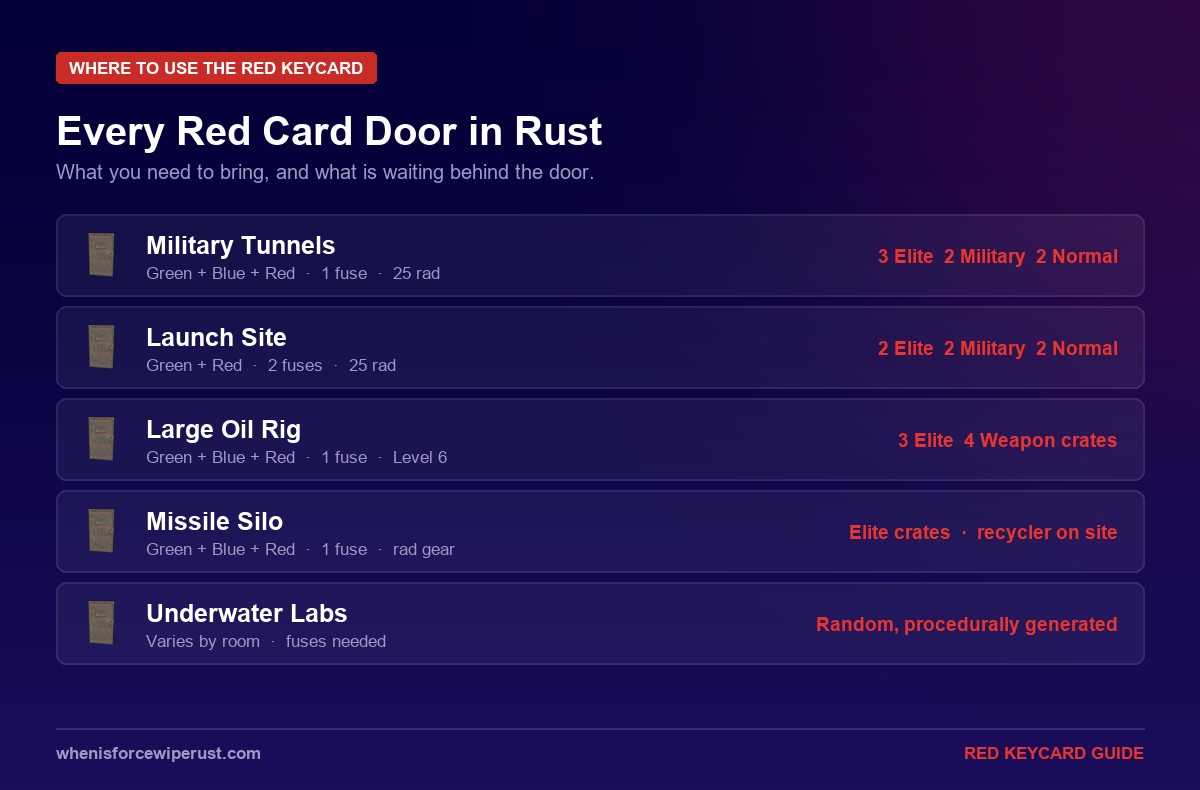
| Monument | Cards Needed | Fuses | Rad Protection | Behind the Red Door |
|---|---|---|---|---|
| Military Tunnels Richest | Green + Blue + Red | 1 | 25 | 3 Elite, 2 Military, 2 Normal |
| Launch Site | Green + Red | 2 | 25 | 2 Elite, 2 Military, 2 Normal |
| Large Oil Rig | Green + Blue + Red | 1 | None | 3 Elite + 4 Weapon crates |
| Missile Silo | Green + Blue + Red | 1 | Medium | Elite crates, recycler on site |
| Underwater Labs | Varies by room | Varies | None | Procedurally generated |
Note the card counts. Military Tunnels wants all three cards in your inventory at once, because the route swipes green, then blue, then red on three separate doors. Launch Site is the odd one out: it needs a green and a red but no blue, and it wants two fuses instead of one.
Red Card Monument Walkthroughs
Military Tunnels
The richest red room in the game at three elite crates, and the most dangerous. Military Tunnels is crawling with NPC scientists who shoot straight and do not miss much, so bring a real gun and armour, not just a rad suit. You want 25 rad protection, one fuse, and all three keycards.
- Take the right hand door at the front entrance and head for the Armory door on the right.
- Go down the hall, first door on the right, and find the fuse box and timer. Place your fuse and start the timer.
- Head back out the way you came and follow the tunnel as it curves right.
- Go through the hole in the fence on your left.
- Find the door marked Storage across the tracks and swipe your green card.
- Head right and flip the switch labelled Laboratory.
- Move to the centre of the core and clear the crates off the rail car on your way through.
- Keep going straight until you see the blue door on the right marked Laboratory, and swipe your blue card.
- Swipe your red card on the final door and clear the room.
Launch Site
The biggest monument on the map and the one that punishes poor preparation hardest. You need two fuses, a green card, a red card, 25 rad protection and a full jerry can of water for the main building. No blue card required.
- Find the green building marked 011 and flip the switch inside.
- Head past the rocket to the stone building with the metal ramp, go downstairs into the room on the left, and flip that switch.
- Move to the scaffolding and drop through the hole, then jump across to the ledge.
- Activate the timer and go through the doorway, jumping the beams to the far side.
- Press the red button, take the loot, then press the exit button.
- Go to the green door at the building near the three silos. First fuse box is here: place a fuse and flip the switch.
- Cross to the far side near the two blue containers. Second fuse box is inside that door: place your second fuse and flip the switch.
- Exit and enter the large building through the red door on the right. Climb up, clear the crates, and flip the switch to get out.
Large Oil Rig
The red room sits on Level 6, up near the helipad, in the small white building. Inside is roughly three elite crates and four weapon crates, plus the hackable locked crate. No radiation here, but the rig is a PvP meat grinder and there is no back door once you are on it.
The full rig chain runs green on Level 3, blue on Level 4, a fuse for the side door that holds another blue card and a recycler, then red on Level 6. Starting the hackable crate begins a 15 minute countdown that calls in a Chinook full of heavy scientists, so decide whether you are hacking before you swipe, not after.
Missile Silo
Missile Silo asks for the full set: green, blue and red, plus a fuse to power the puzzle room, plus rad protection. The entry hatch is the part that catches people out. It opens for around 20 seconds, so once it moves you drop in immediately or you wait for the cycle again. There is a recycler on site, which makes it one of the better places to process what you just looted before the walk home.
Underwater Labs
Labs are the wildcard. The modules are procedurally generated, so the puzzle layout changes every time and no fixed walkthrough exists. Some labs have a red card room, plenty do not. What is consistent is that labs need fuses for their power boxes and that they are one of the better places to find spare green and blue cards, which makes them a decent way to restock the chain rather than a reliable red card sink.
Swipes, Durability and the Unpowered Door Trap
This is the mechanic that costs players the most cards, and it is barely explained in game.
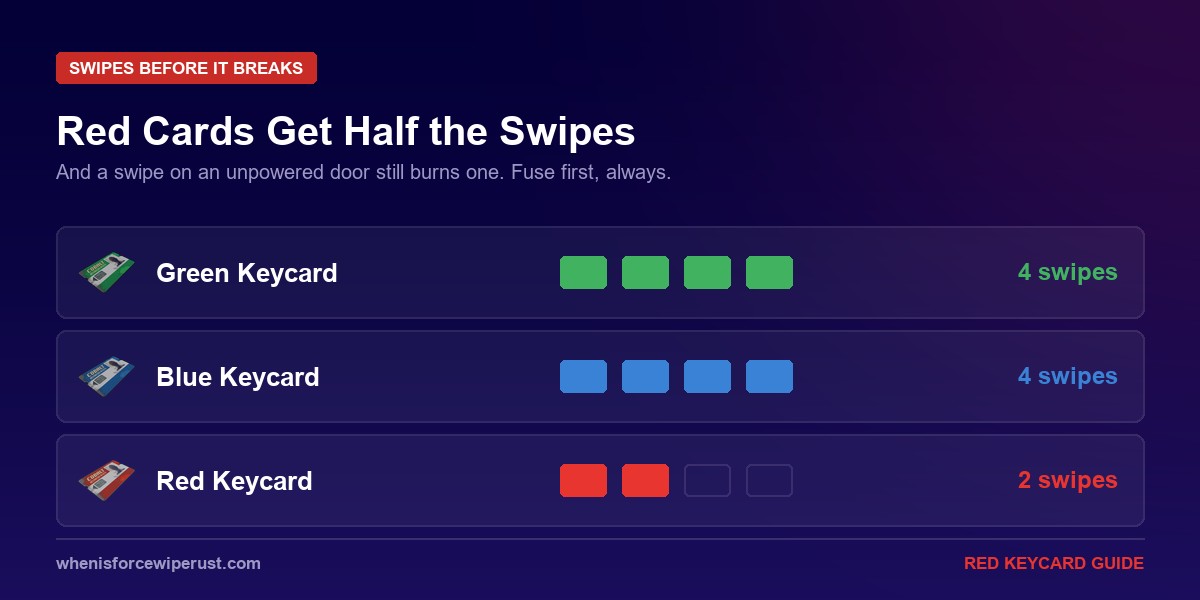
Keycards are not single use, but the red one nearly is. Green and blue cards survive four swipes before they break. A Red Keycard survives two. That is one full Military Tunnels run and one Launch Site run, or two Launch Sites, and then the card is gone.
The trap is this: swiping a card reader on an unpowered door still consumes a swipe. If you have not placed the fuse yet, or the timer has run out, or someone else already flipped the switches back, the reader takes your swipe and gives you nothing. On a two swipe red card that mistake costs you half the card.
One more thing worth knowing: a partially used card looks identical to a fresh one in your inventory. There is no visible counter. If you are running with a team, agree on who carries the card and how many swipes are left on it, because the moment it changes hands nobody knows.
What Is Actually Behind the Red Door
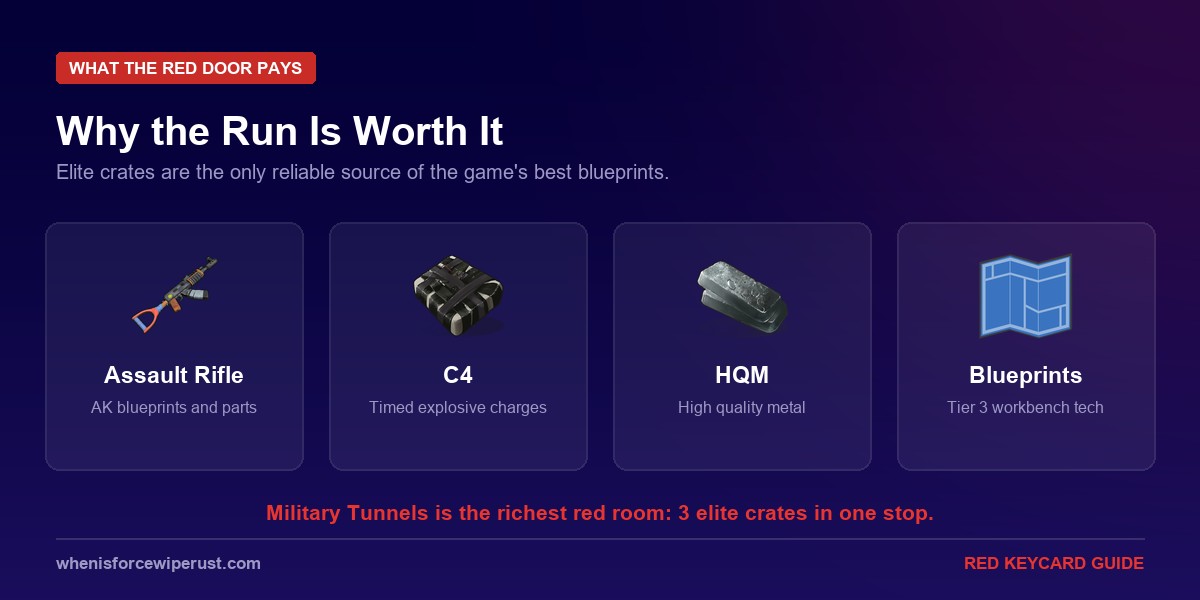
Every red door leads to elite crates, and elite crates are the best container in the game outside of the locked crate. They are where Tier 3 blueprints, assault rifle components, C4, explosives and high quality metal come from in volume.
Put in wipe terms: a single Military Tunnels red room with three elite crates can carry a group from mid wipe scrap gathering to a genuine raiding position in one trip. That is the difference between researching an assault rifle and still running a bow on day four.
It is also worth doing the maths on what that loot is worth before you spend it. If a run pays out explosives, check what those actually buy you against a target with our Rust raid calculator before you throw them at the first stone wall you see. Elite crate C4 is far too expensive to waste on a bad entry point.
The Red Card Run Kit
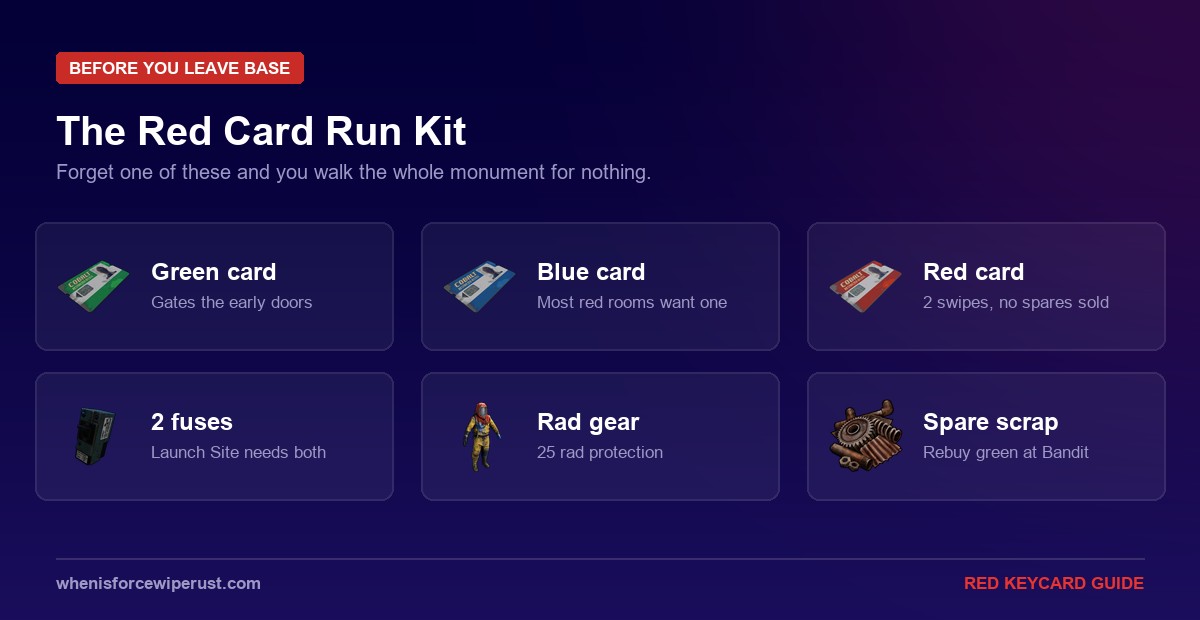
All three keycards. Green, blue and red. Military Tunnels, Large Oil Rig and Missile Silo all want the full set in one trip.
Two fuses. One is enough for most monuments, Launch Site needs two. Fuses are cheap and they burn out, so carry a spare regardless. Nothing is worse than reaching a fuse box with an empty inventory slot where the fuse should be.
Radiation protection. 25 rad protection covers Military Tunnels, Launch Site, Water Treatment, Train Yard and Power Plant. Airfield only needs 10. A hazmat suit handles all of it, though most players prefer a proper armour set plus rad tea so they can actually fight back.
A gun you can win a fight with. Every red card monument has scientists, and the ones at Military Tunnels and Launch Site hit hard. A bow is not a plan.
Spare scrap. Twenty scrap rebuys a green card at Bandit Camp. Bringing 100 means you can rebuy a blue at Outpost if your run goes wrong, instead of restarting the entire chain.
Water and food. Launch Site specifically wants a full jerry can for the main building, and every one of these monuments is a long trip from home.
Red Keycard Myths and Common Mistakes
A lot of what circulates about red cards is out of date or simply wrong. Here is what to ignore.
Myth: you can buy a Red Keycard at Bandit Camp. You cannot. Green cards sell at Bandit Camp for 20 scrap and blue cards sell at Outpost for 100, but no NPC vendor stocks red. Several guides and item databases list a scrap price for it, and players show up at the vending machines looking for a card that is not there. Red has to be earned from a blue puzzle.
Myth: Small Oil Rig needs a red card. It does not. Small Oil Rig tops out at a blue card room in the admin building on Level 4. The monument that has the genuine red door is Large Oil Rig, on Level 6. Confusing the two is a classic way to waste a card by carrying it to the wrong rig.
Myth: keycards are single use. Also wrong, and it causes people to hoard cards they could be spending. Red gets two swipes, green and blue get four each. Use them.
Mistake: swiping before powering the door. Covered above, and it is the expensive one. The reader does not care whether the door can open.
Mistake: running the puzzle at peak server hours. Monument puzzles are loud, slow and predictable. Every switch you flip announces your position. Off peak runs are dramatically safer for the same loot.
Pro Tips for Red Card Runs
- Farm the blue puzzle, not the red card. The five blue card monuments pay four to nine crates plus the card. If you run all five in a wipe you end up with a stack of red cards and a lot of loot, rather than one card and one shot at using it.
- Do the red door first, the rest of the monument second. The elite crates are the prize and they are also what everyone else is coming for. Clear the room, then decide whether the surface loot is worth the extra ten minutes.
- Buy the green, run the blue. Twenty scrap for a green card is the single best value purchase in the keycard chain, and it saves you a whole small monument run.
- Carry the card, not the plan. If you die on approach, everything in your inventory is now funding somebody else’s raid. Split the cards across the team so one death does not end the run.
- Time your runs around the wipe. Day one nobody has fuses. Day two the puzzles are packed. Mid wipe is the sweet spot, when servers have thinned out but the monuments have not been farmed flat.
- Learn the exits. Military Tunnels and Launch Site both have people camping the obvious way out, exactly because they know what you are carrying when you leave.
Planning your monument runs? Every keycard chain resets when the map does. Check the live force wipe countdown before you invest a wipe’s worth of scrap in fuses.
Force Wipe CountdownRed Keycard FAQ
Where do you get a Red Keycard in Rust?
What monuments use a Red Keycard?
How many times can you use a Red Keycard?
Can you buy a Red Keycard in Rust?
Can you craft a Red Keycard?
What is the easiest Red Keycard monument?
Which Red Keycard room has the best loot?
Do you need a Blue Keycard for Launch Site?
Does Small Oil Rig need a Red Keycard?
How many fuses do you need for a Red Keycard run?
How long does a Red Keycard last on the ground?
Do keycards carry over a wipe?
Final Thoughts
The Red Keycard is less an item than a checklist. Buy the green, run a blue puzzle, cash the blue in at Water Treatment or Train Yard, then spend the red at Military Tunnels while you still have both swipes. Nothing in that chain is difficult on its own. What kills runs is arriving at the last door missing a fuse, missing a card, or having quietly burned a swipe on a reader that had no power.
Sort the kit before you leave base and a red card run turns into the most reliable loot in Rust. Forget one item and it turns into a very long walk.
Sources
- Puzzle routes and crate counts: Rustafied, Advanced Red Puzzle Solutions and Rustafied, Medium Blue Puzzle Solutions
- Keycard swipe counts, vendor prices and spawn locations: BisectHosting, Rust Keycards Guide
- Oil Rig level layouts and keycard tiers: BisectHosting, Oil Rig Monument Guide
- Item data, despawn time and stack size: RustHelp, Red Keycard
- The game itself: Facepunch Studios