
Search Bradley Rust and you will get a pile of numbers that were true in 2019. Here are the current ones.
The Bradley APC is the armoured personnel carrier that grinds around Launch Site on a fixed loop, and it is the single most misunderstood fight in the game. Not because it is hard. Because almost every guide you will find describes a version of it that stopped existing years ago.
Bradley does not have a weak spot. It does not care what you are wearing. It ignores bullets, arrows, melee, fire and fall damage completely. It has exactly 1,000 health and it only loses that health to explosives. That part has been stable for a long time.
What changed, and what most write ups still miss, is that Bradley now fights back on foot. Hit it hard enough and the hatch pops, smoke goes up, and scientists climb out to defend it. Later waves include heavies carrying miniguns and flamethrowers. If you planned a leisurely seven rocket kill from a rooftop, that is the thing that ends your run.
This guide covers the real numbers: exactly how many of each explosive it takes, what every option costs in sulfur, where to stand, how the scientist waves work, the full APC crate loot table, the burn and salvage timers, the respawn clock, and the road Bradleys that flood the map in the last day of every wipe.
- What it is
- Where it spawns
- Stats
- How many rockets
- How to kill it
- Scientist waves
- Loot
- The wreck
- Respawn and healing
- Road Bradleys
- Commands
- Mistakes
- FAQ
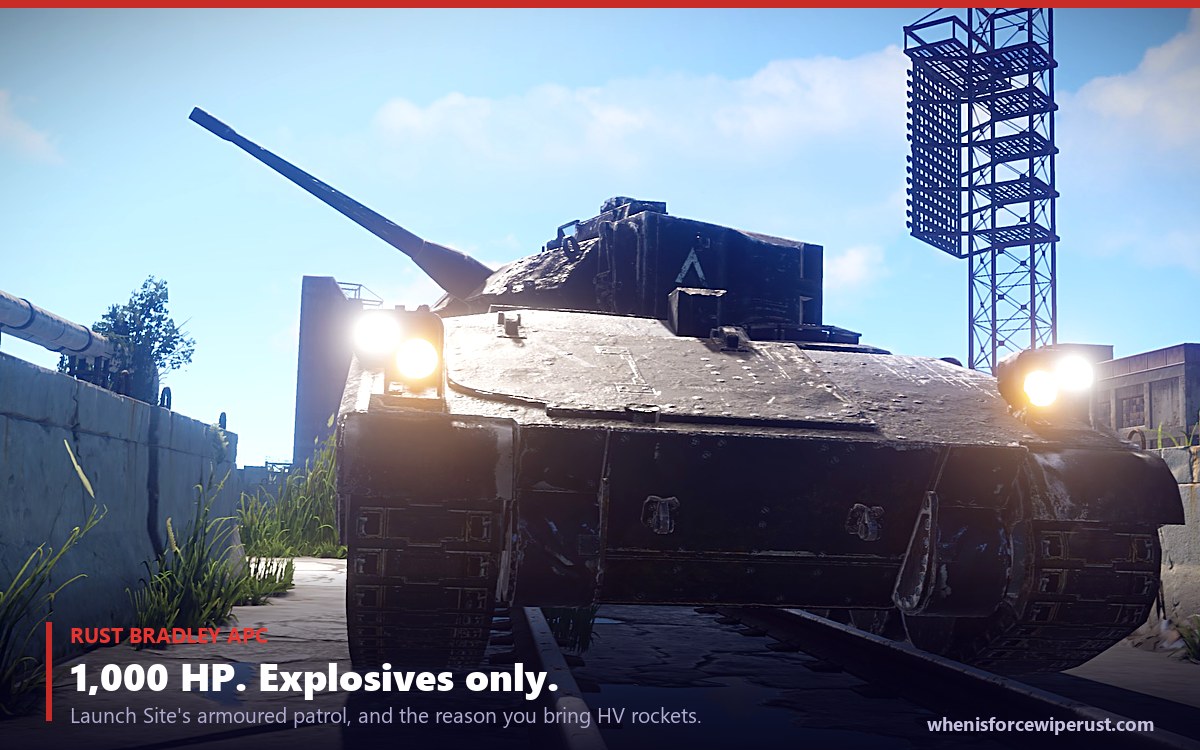
What is the Bradley in Rust?
The Bradley APC is an NPC controlled armoured vehicle. It is not a boss you can sneak past and it is not a puzzle. It drives a fixed circuit of the paved roads at Launch Site, and it opens fire on any player it sees, regardless of gear, clothing or crouch state. Hiding in a bush does not work. Wearing a full hazmat suit does not make you invisible to it.
It carries two weapons and they do very different jobs:
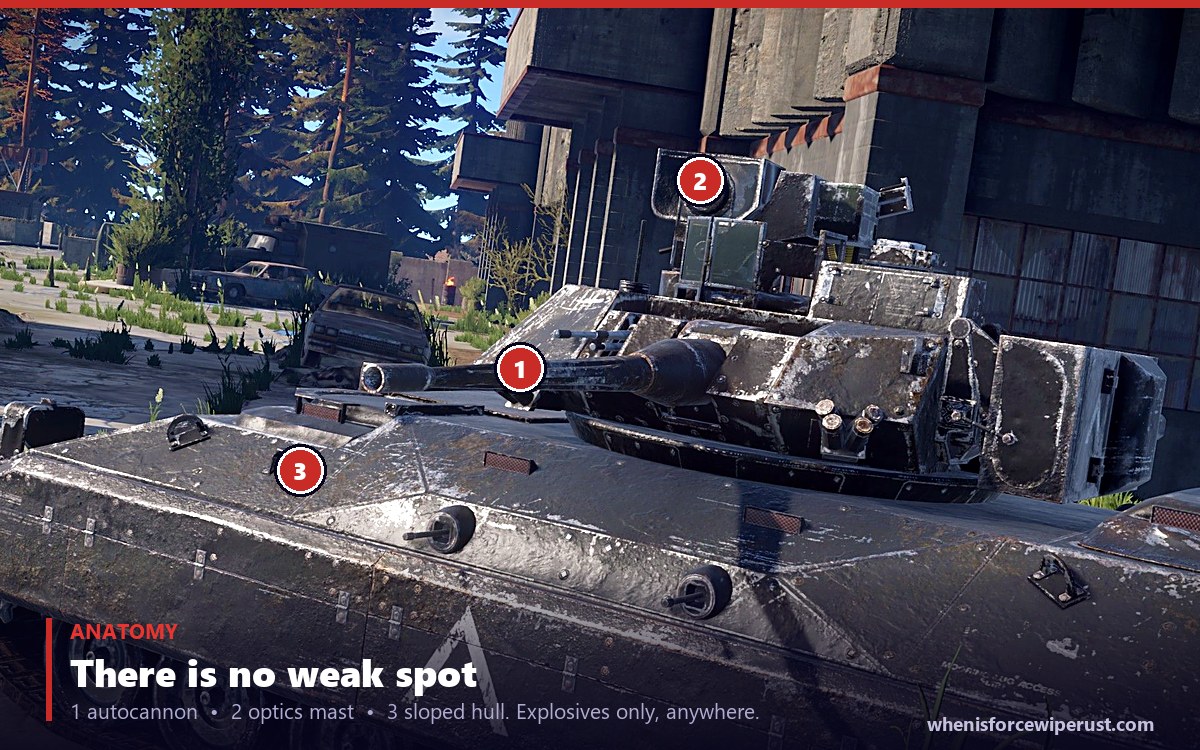
- The autocannon. The long barrel on the turret. It fires short bursts of armour piercing shells that land for roughly 25 to 30 damage each with a small explosion radius. A four shell burst kills an unarmoured player outright and badly hurts a geared one. This is the gun that reaches across the monument.
- The machine gun. Mounted alongside, very high rate of fire, roughly 7 damage per hit. On its own it is survivable for a second or two. Combined with the cannon it is what finishes you while you are trying to retreat.
The important mechanical detail is what Bradley ignores. Every non explosive damage type is filtered out entirely. Your AK does nothing. A bolt action headshot does nothing. Incendiary rockets do nothing meaningful, because the fire component is not explosive damage. Only the explosive damage on an explosive item counts, which is why the answer to “what gun kills Bradley” is always “none of them, bring a launcher”.
Where does Bradley spawn in Rust?
In normal play, one place: Launch Site. It is the only monument with a Bradley, and there is only ever one of them at a time. That is set by the server variable bradley.enabled, which is on by default on official servers.
It does not roam the whole monument freely. It follows the paved road network, which threads through the rocket pad half and the industrial half of Launch Site and loops back on itself. Learn that loop and you know where it will be in thirty seconds, which matters enormously when you are planning where to stand.
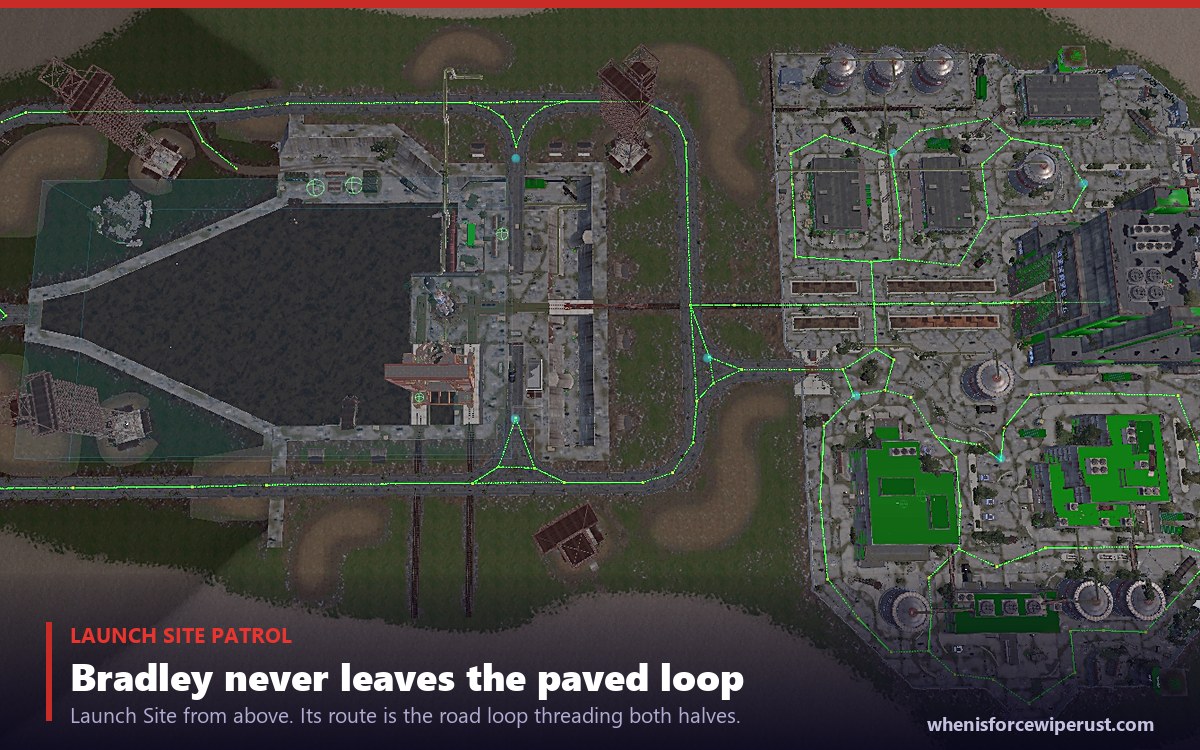
Launch Site itself is worth understanding before you go, because you are signing up for the whole monument, not just the tank:
It is a Tier 3 monument with a green card and a red card puzzle and two electric fuses, 77 crates, 64 barrels, a recycler on site, and a no build zone of roughly 92,205 square metres. It is not a safe zone. Containers reset on the usual ~30 minute cycle. The radiation is mild by red card standards, but you still want proper coverage. See the red keycard guide if you are also planning to run the puzzle while you are there.
Bradley APC stats
| Stat | Value | Notes |
|---|---|---|
| Health | 1,000 HP | Unchanged for years. It launched at 500 in 2017. |
| Damage taken | Explosives only | Bullets, melee, fire and arrows are filtered out entirely. |
| Spawn location | Launch Site | One at a time, on the paved road loop. |
| Respawn | ~60 minutes | bradley.respawndelayminutes defaults to 60. |
| Autocannon | ~25 to 30 per shell | Armour piercing, small splash, fires in bursts. |
| Machine gun | ~7 per hit | Very high rate of fire at close range. |
| Crates dropped | 3 APC crates | Guaranteed, every kill. |
| Self repair | After ~5 minutes idle | Then back to full in about a minute. |
| Added | 24 August 2017 | Devblog 174, alongside the Launch Site rework. |
How many rockets for Bradley in Rust?
This is the question everyone actually arrives with, so here is the whole answer in one table. Every figure is per direct hit on the Bradley, against its 1,000 HP pool.
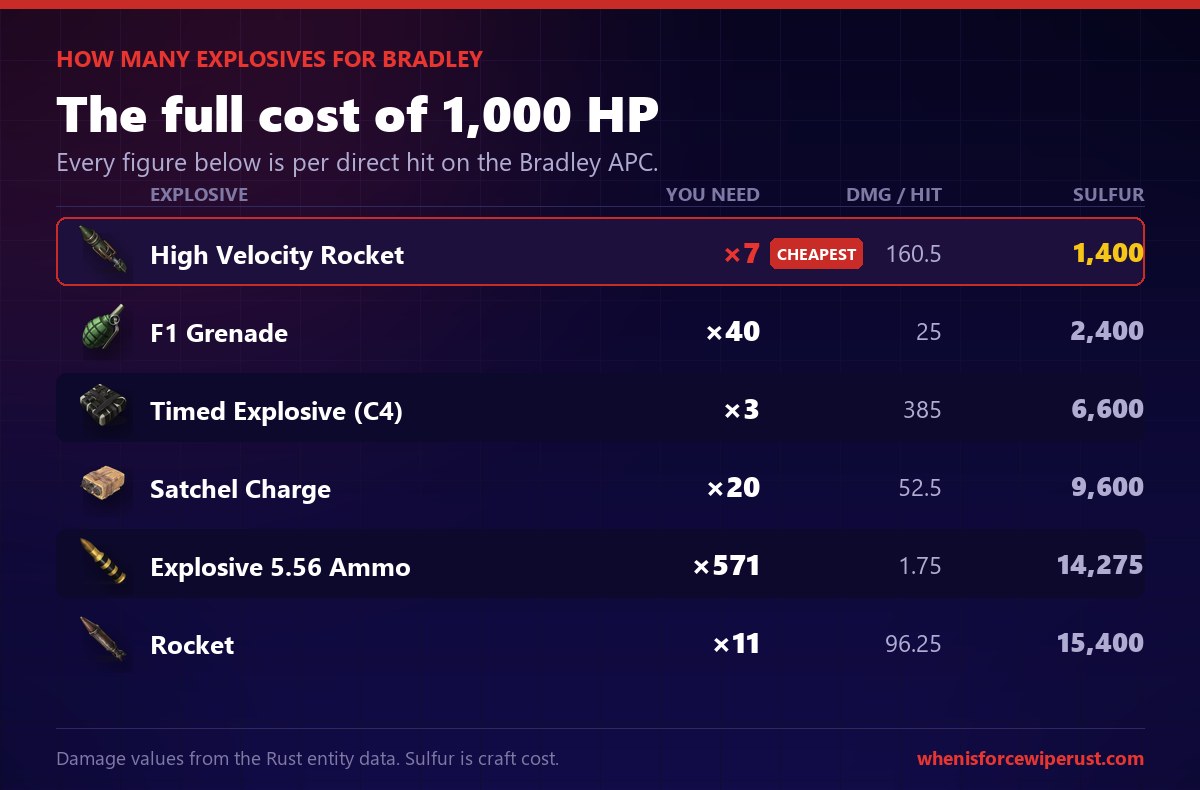
| Explosive | Damage per hit | You need | Sulfur cost |
|---|---|---|---|
| High Velocity Rocket Cheapest | 160.5 | 7 | 1,400 |
| F1 Grenade | 25 | 40 | 2,400 |
| MLRS Rocket | 160 | 7 | Not craftable |
| Timed Explosive Charge (C4) | 385 | 3 | 6,600 |
| Satchel Charge | 52.5 | 20 | 9,600 |
| 40mm HE Grenade | 12.25 | 82 | Not craftable |
| Explosive 5.56 Rifle Ammo | 1.75 | 571 | 14,275 |
| Rocket | 96.25 | 11 | 15,400 |
| Beancan Grenade | 5.25 | 191 | 22,920 |
Three things jump out of that table.
HV rockets are absurdly efficient here. A standard rocket costs 1,400 sulfur on its own. Seven HV rockets cost 1,400 sulfur in total, because an HV rocket is just 1 Metal Pipe and 100 Gun Powder with no Explosives in the recipe. That is an eleven times saving over regular rockets for the same job. If you take one number away from this page, take that one.
F1 grenades are the no workbench option. Forty grenades for 2,400 sulfur is the second cheapest route, and you do not even have to craft them. F1s are stocked by the vendor at Bandit Camp for single digit scrap each, so a full Bradley kit is achievable on scrap alone in the first days of a wipe. Note that Facepunch runs dynamic vendor pricing now, so the exact scrap number moves with server supply and demand.
Regular rockets are the worst realistic option. Eleven rockets is 15,400 sulfur, more than double what three C4 costs, for a slower and less reliable kill. People still do it because rockets are what they happen to have. If you are farming specifically for Bradley, farm for HVs.
If you want to price this against your other raid plans for the wipe, the raid calculator has the per explosive sulfur numbers for every base target in the game.
How to kill the Bradley APC
There are three methods that actually work. Pick based on what you have, not on what is technically cheapest.
Method 1: seven HV rockets from a rooftop
Craft cost, sulfur and loot sources are in the HV rocket guide. The default. Cheapest, and safest if you pick your building well.
- Build a small respawn base outside the no build zone first. A 1×2 with a bed, a tool cupboard and a box is enough. You will probably die at least once, and the walk back from a beach spawn is what actually ends Bradley runs.
- Bring a rocket launcher, 8 to 10 HV rockets, radiation coverage, medical syringes and bandages, and nothing you are not willing to lose.
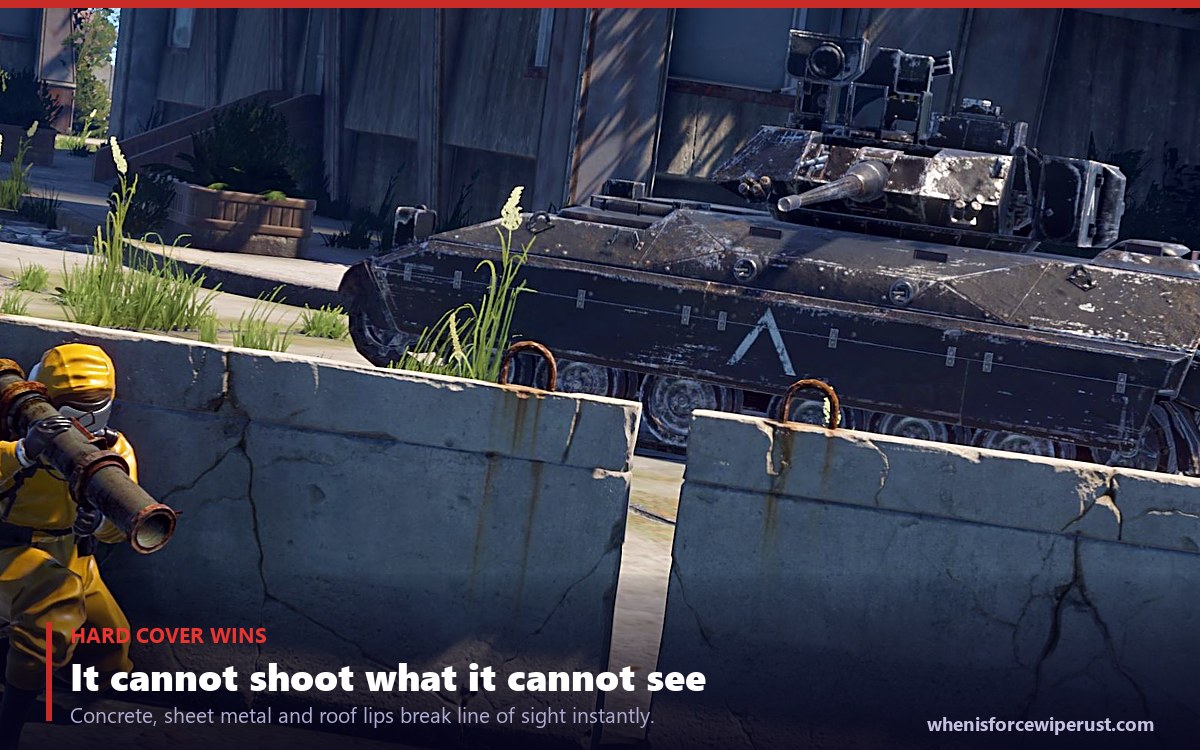
- Get on a roof with hard cover you can drop behind. The two buildings facing each other across the middle of the monument and the recycler building are the classics, because they have a lip you can crouch behind.
- Wait for Bradley to come to your side of the loop. Do not chase it. Its route brings it back.
- Fire, then break line of sight immediately. Peek, fire one, drop. Repeat. Do not stand and trade shots with an autocannon.
- Keep the pace up. If you slow to a rocket every few minutes it starts repairing and you will run out of ammunition before it runs out of health.
Method 2: three C4, thrown
More sulfur, far less exposure, and the fastest kill in the game. It is also the only method that reliably beats the scientist waves, because the whole fight is over in seconds.
- Put each C4 in its own hotbar slot. Switching slots is quicker than waiting through the throw animation on a stack.
- Find a chokepoint on the road loop where you can get within throwing range without being seen. The gateway with the concrete barriers is the classic, and there are bridges and raised walkways the route passes underneath.
- Wait for it to pass, step out, and stick all three on the hull as fast as you can click.
- Expect to die to the blast or to Bradley. That is fine. It dies too, and you respawn at your bed nearby.
Method 3: forty F1 grenades
The budget method, and genuinely viable in the first days of a wipe when nobody has 1,400 sulfur spare yet.
- Buy F1 grenades from the Bandit Camp vendor. Forty of them is a small pile of scrap.
- Get on a low roof or a raised platform that Bradley drives close to. Range matters here because you are throwing, not firing.
- Aggro it with anything, a bow works, then back up so it holds position below you.
- Rain grenades onto it. You will hear the hit marker on every connect. Keep going until it pops.
The catch is time. Forty throws is a long exposure window, which is exactly when the scientist waves become a real problem. Bring a partner to hold the ground floor.
The scientist waves nobody warns you about
This is the part that invalidates most older Bradley guides.
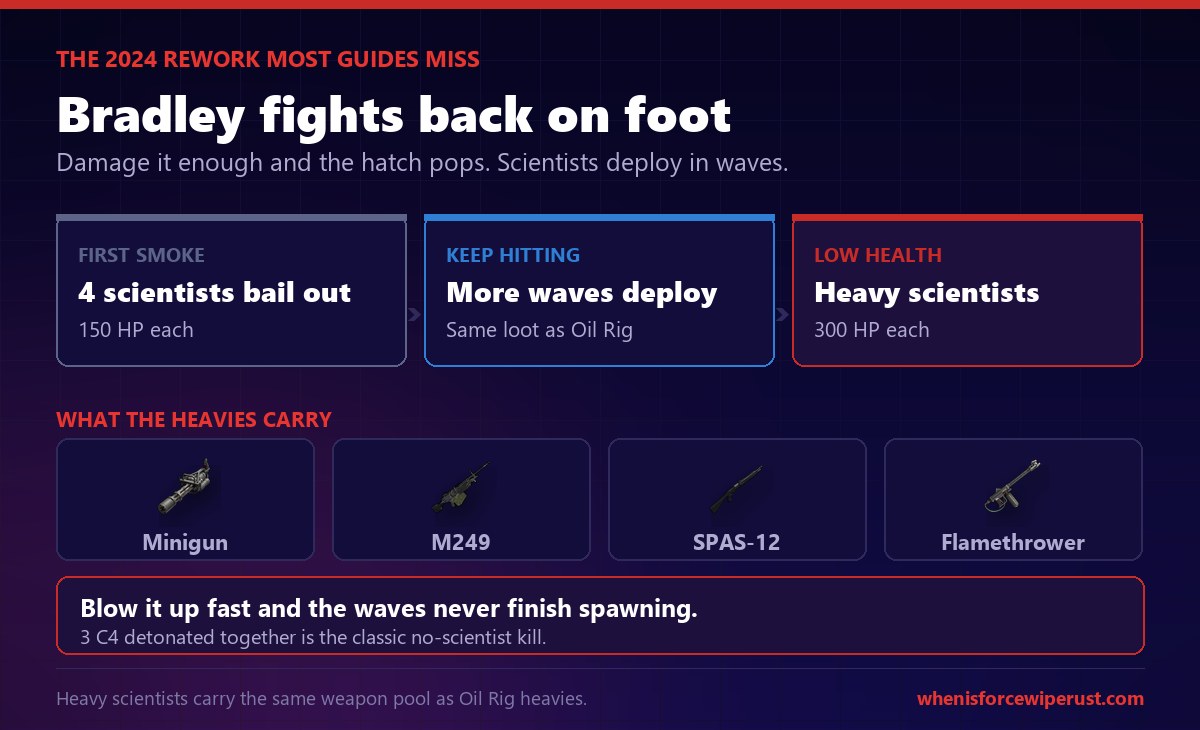
Since a 2024 update, damaging the Bradley makes it deploy infantry. There is a visible puff of smoke, and a first group of four scientists climbs out to defend it. Keep hitting it and further waves deploy as its health drops, and the later waves include heavy scientists.
| NPC | Health | Carries | Threat |
|---|---|---|---|
| Bradley scientist | 150 HP | Standard rifles and pistols | Manageable, but they flank while Bradley pins you. |
| Bradley heavy scientist | 300 HP | Minigun, M249, SPAS-12, military flamethrower | Serious. A minigun heavy will delete you through a doorway. |
They drop the same loot pool as the Oil Rig heavies, so they are not pure downside. Medical syringes, ammunition, and the occasional genuinely good weapon. But they change the shape of the fight completely: a slow chip damage strategy now means fighting an escalating infantry battle on the ground while an autocannon covers them.
If you are fighting the waves, remember they are ordinary NPCs with ordinary hitboxes. Everything in the weapons guide applies to them even though none of it applies to the Bradley itself. Bring a rifle for the scientists and a launcher for the tank.
Bradley loot: what is in the APC crates
Every Bradley kill drops three APC crates, guaranteed. Each crate rolls the table independently, so three rolls per kill.
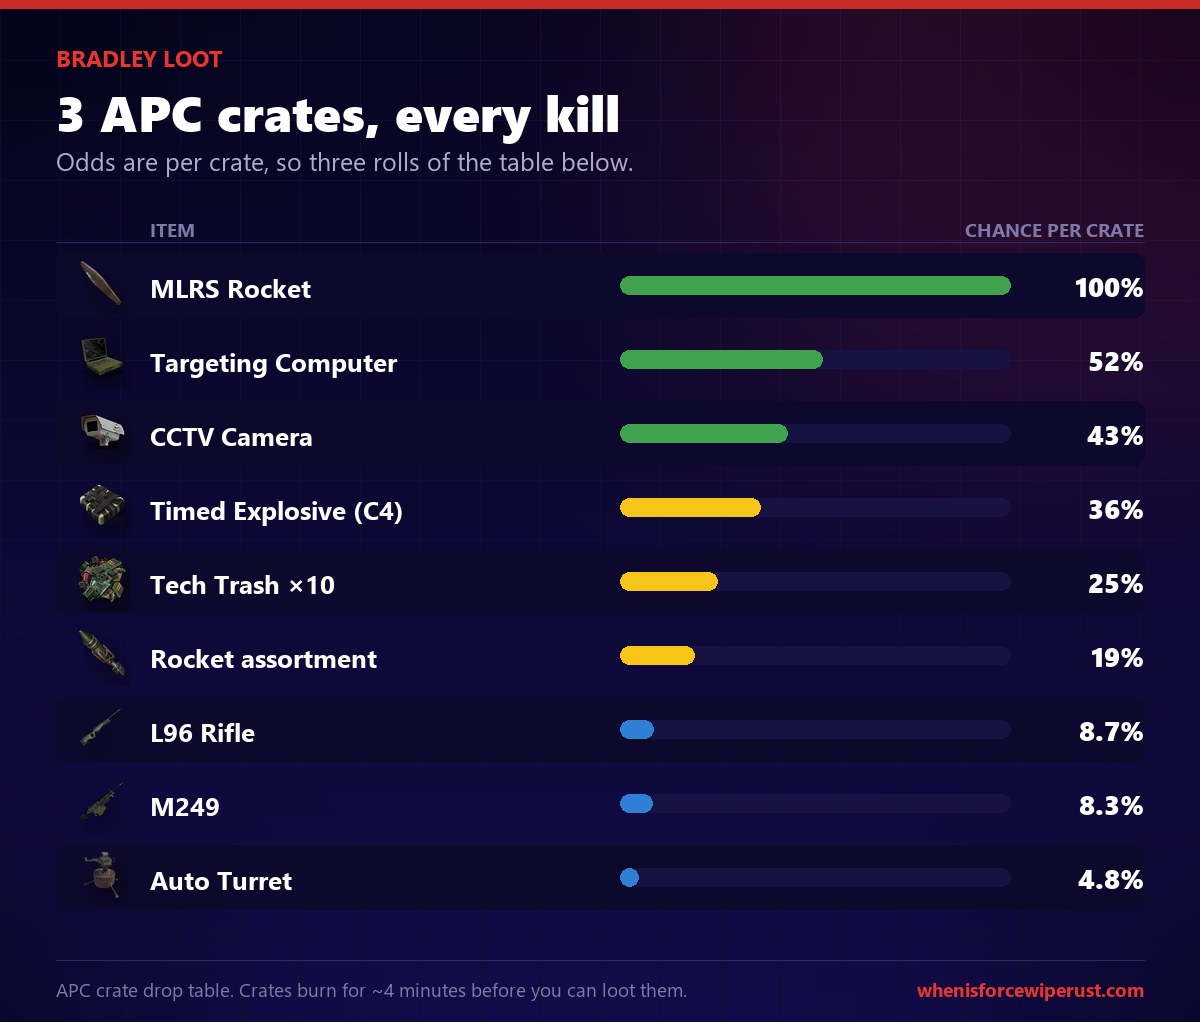
| Item | Chance per crate | Why you want it |
|---|---|---|
| MLRS Rocket | 100% | Guaranteed. Useless without an MLRS, valuable to anyone who has one. |
| Targeting Computer | 52% | Auto turrets. The single best reason to run Bradley. |
| Weapon mod bundle | 50% | Lasersight, 8x scope, burst module, extended mag. |
| CCTV Camera | 43% | Pairs with the targeting computers for turret builds. |
| Timed Explosive Charge | 36% | Free C4. Often pays for the next Bradley run. |
| Armored Door | 30% | Straight upgrade over garage doors on a main. |
| Ladder Hatch | 30% | Base design staple. |
| Tech Trash x10 to 11 | 25% | Bulk components for crafting. |
| 5.56 ammo bundle | 19% | Standard, incendiary, explosive and HV rounds together. |
| Rocket assortment | 19% | Incendiary, HV, MLRS and homing rockets in one drop. |
| Armored Double Door | 15% | Airlock upgrade. |
| L96 Rifle | 8.7% | With a variable zoom scope and ammunition. |
| M249 | 8.3% | With 50 rounds of 5.56. |
| Auto Turret | 4.8% | Fully assembled, no crafting needed. |
The honest summary is that Bradley is an electrical and component run more than a gun run. The guns are a bonus at under 10 percent each. The targeting computers, CCTV cameras and tech trash are what make it repeatable and what make it worth doing every hour rather than once a wipe.
The wreck: burn timers and salvage
Killing it is not the end. Everything burns first, and the burn timers are where impatient players get shot.
Those figures come from community timing rather than published values, so treat them as close approximations rather than exact ticks. The practical point does not change: after the kill you have several minutes of standing around next to a burning wreck that is visible across the monument and marked by a smoke column.
Once the wreck cools you can mine it, and it is worth the extra minute. A jackhammer strips it in about 35 seconds for:
| Tool | Charcoal | Metal Fragments | High Quality Metal | Time |
|---|---|---|---|---|
| Jackhammer | 880 | 1,650 | 77 | 35 sec |
| Salvaged Icepick | 880 | 1,650 | 77 | 2 min 23 sec |
| Pickaxe | 880 | 1,650 | 77 | 4 min 42 sec |
| Salvaged Hammer | 660 | 1,238 | 58 | 3 min 42 sec |
| Rock | 436 | 825 | 39 | 14 min 8 sec |
Seventy seven high quality metal for half a minute of work is a real reward, not a consolation prize. Bring a jackhammer or a salvaged icepick. Mining with a rock takes fourteen minutes and you will not survive them.
Respawn time and self repair
How long does Bradley take to respawn?
About one hour. The server variable bradley.respawndelayminutes defaults to 60, and there is a second variable, bradley.respawndelayvariance, that adds a small random offset specifically so the spawn cannot be camped to the second.
That hour is the rhythm of a Bradley farm. Kill it, loot it, mine it, recycle at the on site recycler, and by the time you have run the monument’s crates and puzzle the next one is close to arriving.
Does Bradley heal in Rust?
Yes, and this catches people out constantly. If it goes roughly five minutes without taking damage it starts repairing, and it returns to full health in about a minute once it starts. There is no partial credit. A Bradley you took to 200 HP and then left alone is a Bradley at 1,000 HP when you come back.
Road Bradleys and the end of wipe event
Here is the mechanic that turns Bradley from a monument boss into a map wide hazard, and the one almost nobody plans around.
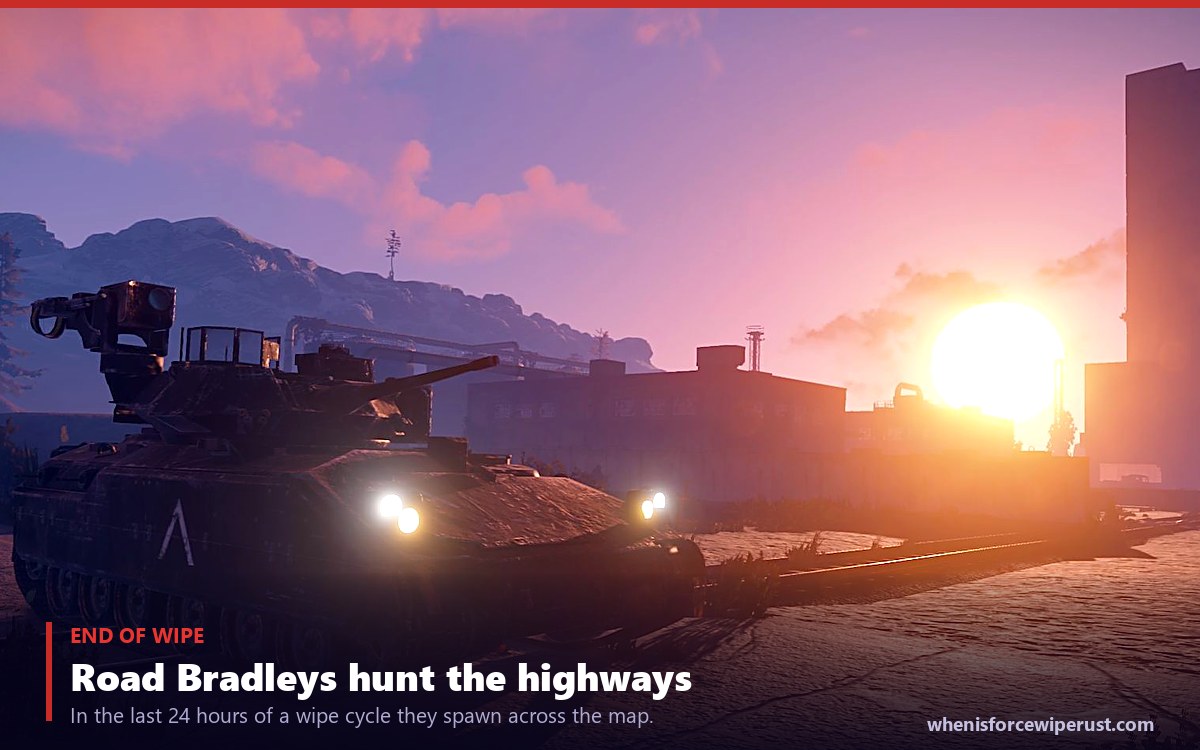
In the final stretch of every wipe cycle, Rust runs an endgame event. Bradleys stop being a Launch Site exclusive and start spawning on roads across the entire map.
The count is not random. It scales with map size on a fixed formula:
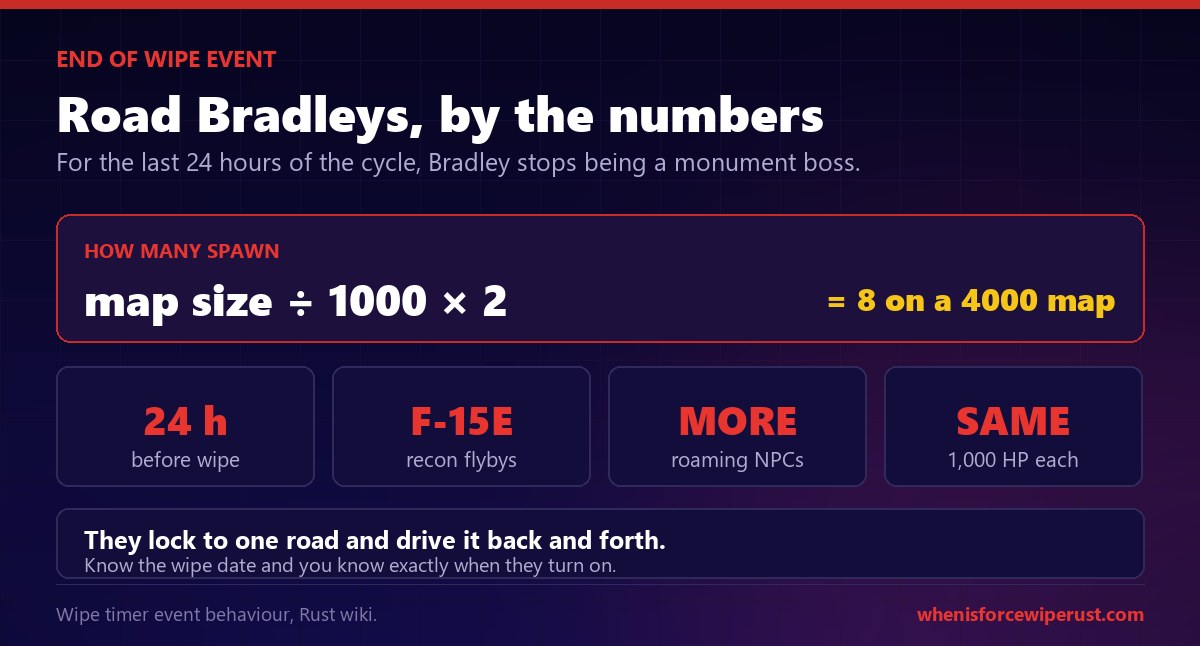
So on a typical 4000 size map you are looking at eight road Bradleys, each with the same 1,000 HP and the same autocannon as the Launch Site one. They lock to a single road and drive it back and forth rather than roaming freely. The same event also puts F-15E recon jets in the sky, which are pure atmosphere and cannot hurt you, and increases roaming NPC numbers across the island.
The event triggers on the last day of the wipe cycle, defaulting to the final hours before the reset. Server owners can shift or disable it with eventschedulewipeoffset.event_hours_before_wipe.
Two practical consequences:
- Road travel gets dangerous overnight. If you run roads for scrap, on a horse, in a car or on a bike, the last day of wipe is when a corner you have taken a hundred times has a tank sitting on it. Fly over instead. A minicopter ignores the problem entirely.
- It is the cheapest loot in the game if you are ready. Eight Bradleys is twenty four APC crates. If you have HV rockets banked and you know the wipe date, the last day of a wipe is the single best loot window of the whole cycle. Almost nobody prepares for it, because almost nobody knows the exact schedule.
Know exactly when road Bradleys turn on.
The event fires in the last 24 hours of the cycle, so the wipe clock is the Bradley clock.
Bradley console commands
Useful on your own server or in a local sandbox for practising rocket leads without burning real sulfur. These require admin or ownership, and none of them work on an official server.
| Command | Default | What it does |
|---|---|---|
spawn bradleyapc | n/a | Spawns a Bradley where you are looking. |
bradley.quickrespawn | n/a | Forces an immediate respawn at Launch Site. |
spawnroadbradley | n/a | Spawns a road Bradley on the road you are looking at. |
bradley.enabled | true | Turns the Launch Site Bradley on or off. |
bradley.respawndelayminutes | 60 | Minutes between death and respawn. |
bradley.respawndelayvariance | 1 | Randomises the respawn so it cannot be camped exactly. |
eventschedulewipeoffset.event_hours_before_wipe | 1 | When the endgame event fires. Set to 0 to disable it. |
There is a much longer list of useful admin and client commands in the Rust console commands guide.
Five mistakes that waste a Bradley run
- Shooting it with guns. Every wipe, someone empties an AK into it and concludes it is bugged. It is not. Non explosive damage is filtered out completely.
- Bringing exactly seven HV rockets. Seven is the theoretical minimum with zero misses against a moving target that is shooting back. Bring nine.
- Taking a break mid fight. Five minutes of no damage and it repairs to full. Partial progress does not bank.
- Looting immediately. The crates burn for around four minutes. Sprinting into the fire does nothing except make you a stationary target for whoever followed the noise.
- Ignoring the wreck. Seventy seven high quality metal is a large chunk of a workbench or an armoured door, and it takes 35 seconds with the right tool.
Bradley Rust FAQ
What is the Bradley in Rust?
How many rockets do you need for Bradley in Rust?
How many HV rockets for Bradley?
How many C4 for Bradley in Rust?
Where does Bradley spawn in Rust?
How long does Bradley take to respawn in Rust?
Does Bradley heal in Rust?
How much health does Bradley have in Rust?
What loot does Bradley drop in Rust?
How long do you wait to loot Bradley crates?
Can you kill Bradley with guns in Rust?
Do scientists come out of the Bradley?
What is a road Bradley in Rust?
Is Bradley worth doing in Rust?
Final Thoughts
Bradley looks like a gear check and it is really a preparation check. The tank at the centre of every Bradley Rust guide has not changed much in years: 1,000 health, explosives only, seven HV rockets, three crates. What has changed is everything around it. The scientist waves punish slow fights. The self repair punishes hesitation. The burn timers punish greed. And the end of wipe event quietly turns the whole road network into Launch Site for a day.
Get the HV rocket blueprint early, keep nine of them in a box, build a bed near Launch Site, and treat every kill as a fifteen minute commitment rather than a five minute one. Done that way it is the most repeatable high tier loot in the game.
Then check the wipe clock. If the reset is close, do not spend your rockets on the one at Launch Site. Wait a day and there will be eight of them driving around on roads with nobody ready for them.
Sources
- Bradley health of 1,000, the APC crate count of three, per explosive damage values and quantities, the full APC crate loot table, and the salvage yields for every tool: Rust Wiki (RustClash), Bradley APC
- Immunity to all non explosive damage, autocannon and machine gun damage figures, the self repair behaviour, and the burning debris after death: Corrosion Hour, How to Kill the Bradley APC in RUST
- The five minute self repair delay and the return to full health in about a minute, plus the three flaming APC crates: DualShockers, How To Find And Defeat The Bradley APC In Rust
- Bradley console commands and variable defaults (
bradley.enabled,bradley.respawndelayminutes60,bradley.respawndelayvariance,spawn bradleyapc,bradley.quickrespawn): Corrosion Hour, RUST Bradley APC Command & Variables - The endgame wipe event, the road Bradley spawn formula of map size divided by 1000 times two, the F-15E flybys, increased roaming NPCs and the
spawnroadbradleycommand: Facepunch Rust Wiki, Server Wipe Timer - Scientists deploying from the Bradley, applying to both the Launch Site and road variants, and the minigun and military flamethrower joining the heavy scientist weapon pool: Facepunch, Waves of Change update
- The first group of four scientists popping out in a puff of smoke after roughly a couple of rockets of damage: Rustafied, Big update next week
- Bradley scientist health of 150 and heavy scientist health of 300, plus their loot tables: RustHelp, Bradley Scientist and RustHelp, Bradley Heavy Minigun Scientist
- APC crate drop chances item by item: RustHelp, Bradley Crate
- Launch Site radiation, scientist count, recycler, crate and barrel counts, puzzle requirements, no build area and reset timer: RustHelp, Launch Site
- High Velocity Rocket recipe of 1 Metal Pipe and 100 Gun Powder, Workbench Level 2, and the 60 scrap research cost: RustHelp, High Velocity Rocket
- F1 Grenade recipe of 30 Gun Powder and 25 Metal Fragments and its availability from the Bandit Camp vendor: RustHelp, F1 Grenade
- The Bradley’s original release, its launch health of 500 and the Launch Site patrol behaviour: Rustafied, Bradley APC is here and Facepunch, Devblog 174