
Somewhere on the map, a base that took a clan three days to build is about to lose its roof to a person who never came within 300 metres of it. There is a low mechanical whine from the desert, a stack of rockets climbs into the sky on tails of fire, and forty seconds later the sky opens up over a compound that thought it was safe.
That is the MLRS, and it is the single most theatrical weapon in Rust. It is also, once you understand the logistics, one of the most misunderstood.
The MLRS in Rust is the M270 Multiple Launch Rocket System, a static rocket-artillery platform that spawns at the Desert Military Base. You load it with 1 to 12 MLRS Rockets, seat an MLRS Aiming Module in the driver console, mark a spot on a map, and rain a barrage down anywhere on the map. Each rocket does 500 damage in a 15 metre blast radius. Every part of it is loot only, the module is destroyed the moment you fire, and there is a 20 minute cooldown before the launcher can be used again.
This MLRS Rust guide has every verified number: where the launcher lives, how to load and aim it, how many rockets you can fire at once, the cooldown that Facepunch doubled in 2024, exactly how much damage a rocket does to walls, how to shoot the whole barrage out of the sky with SAM sites, and the honest answer to whether the MLRS is worth the trip.
- What it is
- Stats
- Rockets & module
- How to use it
- How to aim
- Rockets per salvo
- Cooldown
- Damage & raid cost
- How to counter it
- Is it worth it?
- FAQ
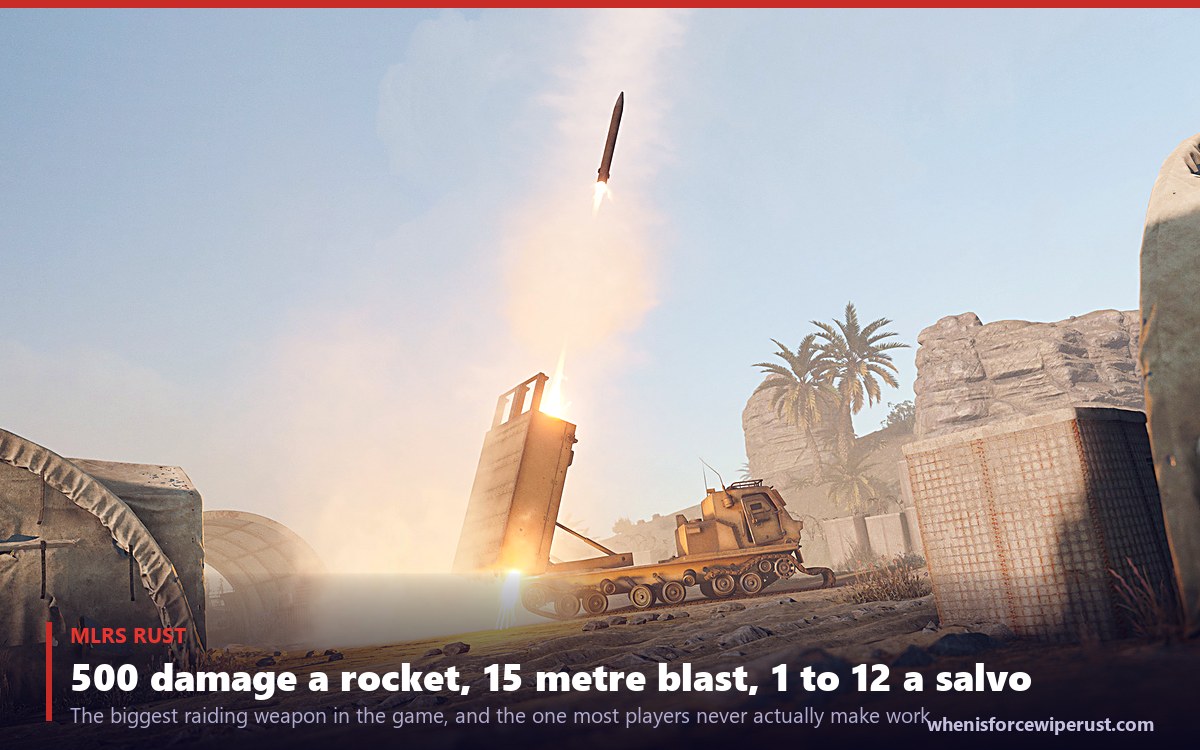
What is the MLRS in Rust?
The MLRS is a fixed rocket-artillery vehicle. It is modelled on the real M270 Multiple Launch Rocket System, and in game it functions as a long range siege weapon you use to bombard a base from across the map without ever leaving the monument.
The important word is static. The MLRS technically counts as a vehicle, but you cannot drive it. It sits on its pad at the Desert Military Base, you climb into the driver seat, and you fire from there. The rockets go into the pods on the back of the launcher, and a control panel on the driver seat is where the aiming happens.
It arrived in the MLRS and Desert Base update on 4 November 2021, which added the Desert Military Base monument specifically to house it. Before that, the biggest thing you could point at a base was a rocket launcher and a lot of patience. The MLRS changed the ceiling on how much damage a single player could deliver in one action.
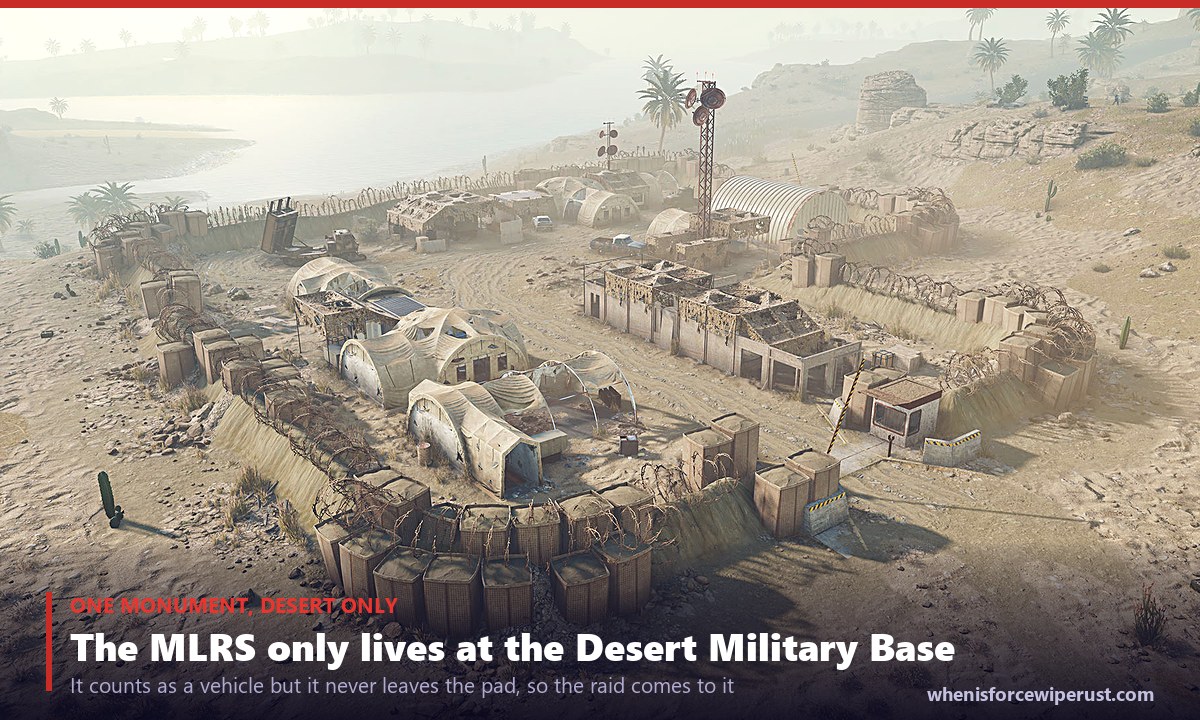
Where is the MLRS?
There is exactly one MLRS per map, and it lives at the Desert Military Base, sometimes called the Abandoned Military Base. As the name says, that monument only generates in the desert biome. If your map has no desert, there is no MLRS on it.
The monument itself is a scientist-guarded compound with no radiation, so getting to the launcher is a fight before it is a raid. You do not need a keycard for the MLRS, but you are exposed the entire time you sit in the driver seat, which becomes the whole problem with the weapon further down this page.
MLRS Rust stats

| Stat | Value | Notes |
|---|---|---|
| Location | Desert Military Base | Desert biome only, one per map |
| Type | Static vehicle | Counts as a vehicle, cannot be driven |
| Rockets per salvo | 1 to 12 | You choose how many to load |
| Rocket damage | 500 | Compare a normal rocket at 350 |
| Blast radius | 15 m | A normal rocket is 3.8 m |
| Flight time | 60 to 70 seconds | The delay between firing and impact |
| Cooldown | 20 minutes | Doubled from 10 minutes in May 2024 |
| Aiming module | Loot only | Destroyed every time you fire |
| Rockets | Loot only | Cannot be crafted or bought |
| Rocket shortname | ammo.rocket.mlrs | Stack size 6, despawn 1 hour |
| Module shortname | aiming.module.mlrs | Stack size 1 |
| Added | 4 November 2021 | MLRS and Desert Base update |
| Counter | ~3 SAM Sites | Shoots the rockets down mid flight |
How to get MLRS rockets and the aiming module
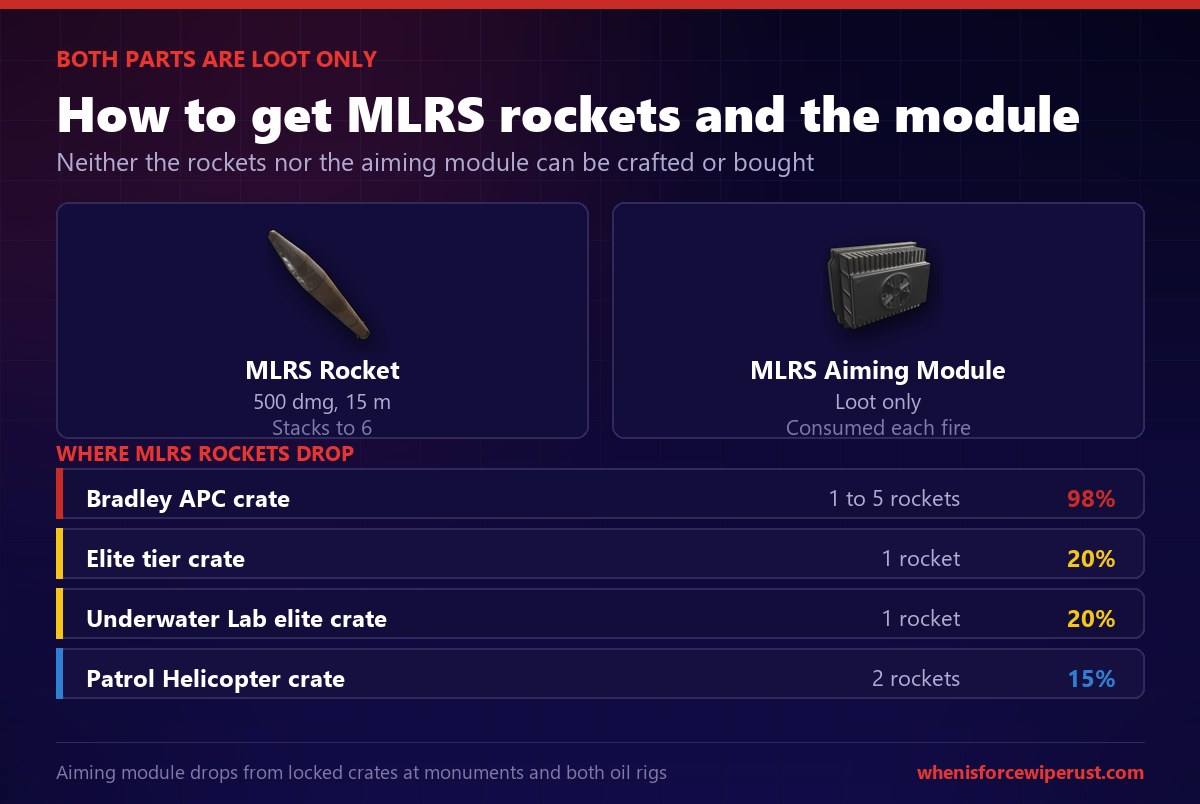
This is where the MLRS stops being a fantasy and starts being an accounting problem. You cannot craft any part of it, and you cannot buy any part of it. To fire a single barrage you need two separate loot items, and one of them is destroyed as soon as you pull the trigger.
MLRS Rockets
MLRS Rockets are loot only. They drop from the highest tier fights and crates in the game, which is deliberate. Facepunch never wanted them to be cheap.
| Source | Amount | Chance |
|---|---|---|
| Bradley APC crate | 1 to 5 | 98% |
| Elite tier crate | 1 | 20% |
| Underwater Lab elite crate | 1 | 20% |
| Patrol Helicopter crate | 2 | 15% |
The Bradley APC at Launch Site is far and away the best source. Its crates drop MLRS rockets at a 98 percent chance, 1 to 5 per crate, and Bradley drops three crates. Kill Bradley twice and you usually have a full barrage. That is not a coincidence: the game wants you to earn a barrage by beating one of its hardest events first.
The MLRS Aiming Module
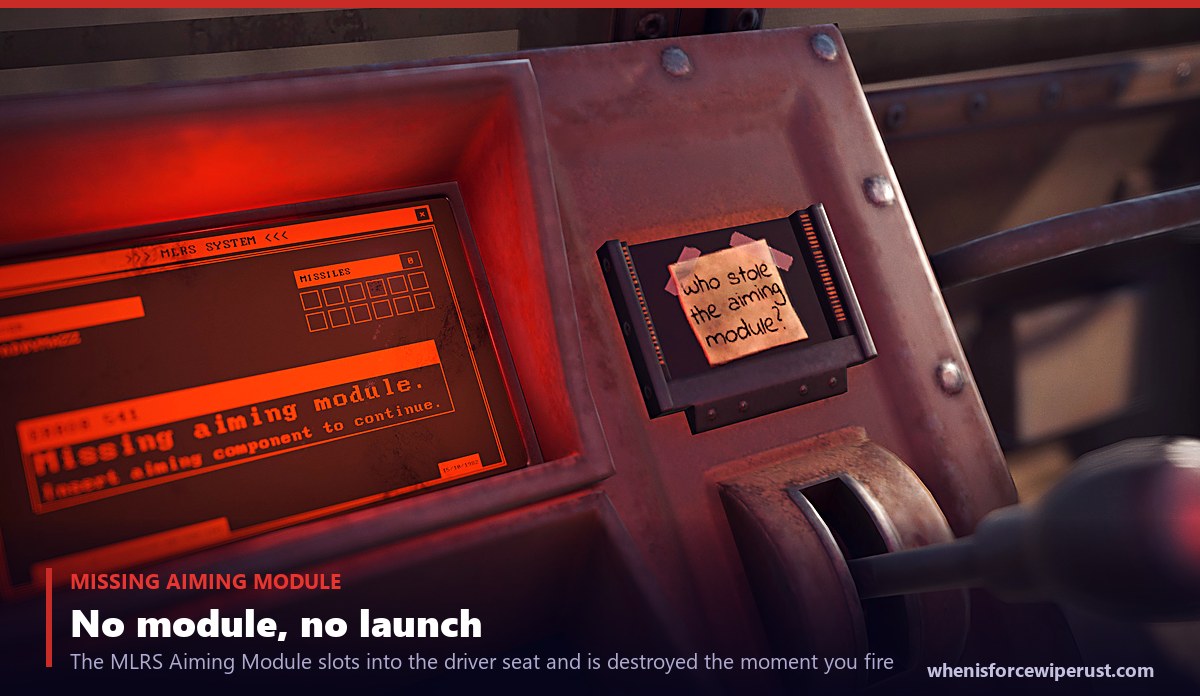
The MLRS Aiming Module is the part that catches everyone out. It is also loot only, it drops from locked crates at monuments and on both oil rigs, and it is destroyed every time you fire the launcher. One module equals one barrage. There is no reusing it, no repairing it, and no crafting a new one.
Because the module is a one-shot item that comes from the same hackable Locked Crates you fight over all wipe, it is usually rarer than the rockets themselves. Plenty of teams sit on a stack of MLRS rockets for days waiting to find a module. If you want to plan around it, treat the module as the real bottleneck, not the ammo.
An MLRS run only makes sense with time left on the wipe. Fire a barrage the night before force wipe and you just wasted the rarest loot in the game.
See the force wipe countdownHow to use the MLRS in Rust
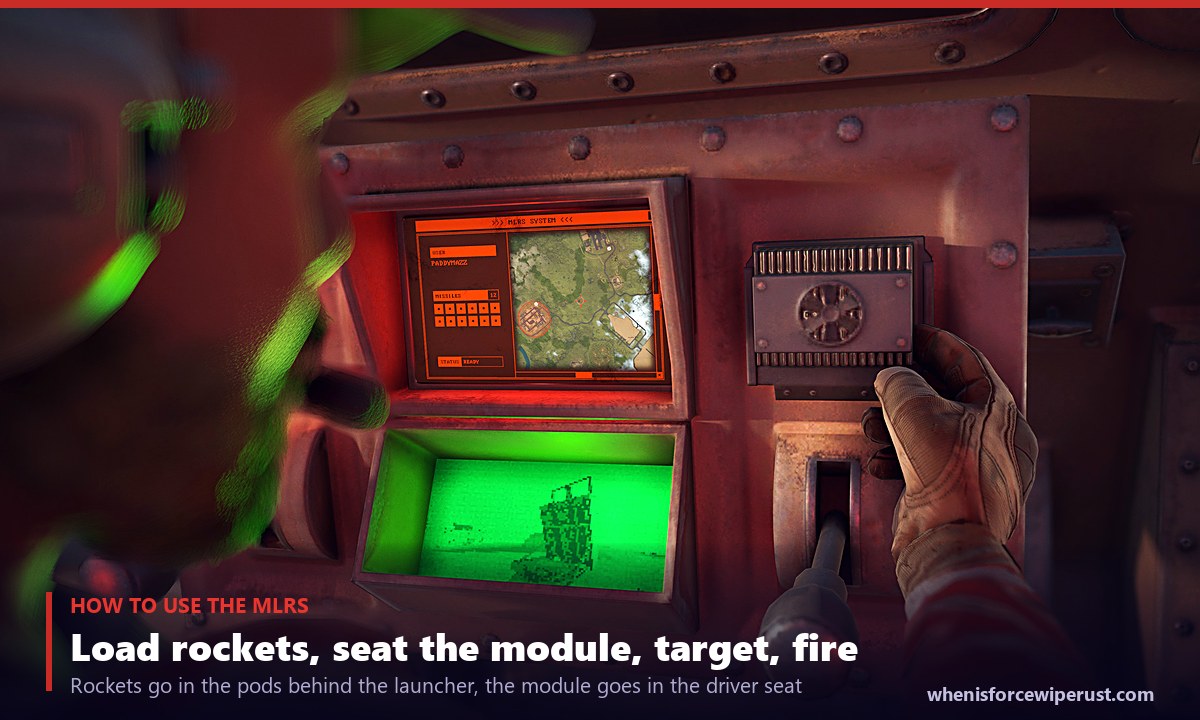
Once you have the rockets and a module, firing the MLRS is a short checklist. The order matters, because the launcher will not let you do the later steps until the earlier ones are done.
- Load the rockets into the pods. Walk to the back of the launcher and place your MLRS Rockets into the storage on the rear of the vehicle. Load anything from 1 to 12.
- Get into the driver seat. The controls live there, not on the pods.
- Insert the MLRS Aiming Module. Place the module into the control panel slot. If you have done it correctly, the console screens light up and the targeting map becomes available.
- Open the targeting screen and pick your spot. Interact with the map screen and click where you want the barrage to land.
- Leave the targeting screen. Back out of the map once the impact circle is where you want it.
- Press Fire. The fire button sits to your left in the driver seat. Hit it and the rockets self propel toward the target.
How to aim the MLRS: red circle vs white circle
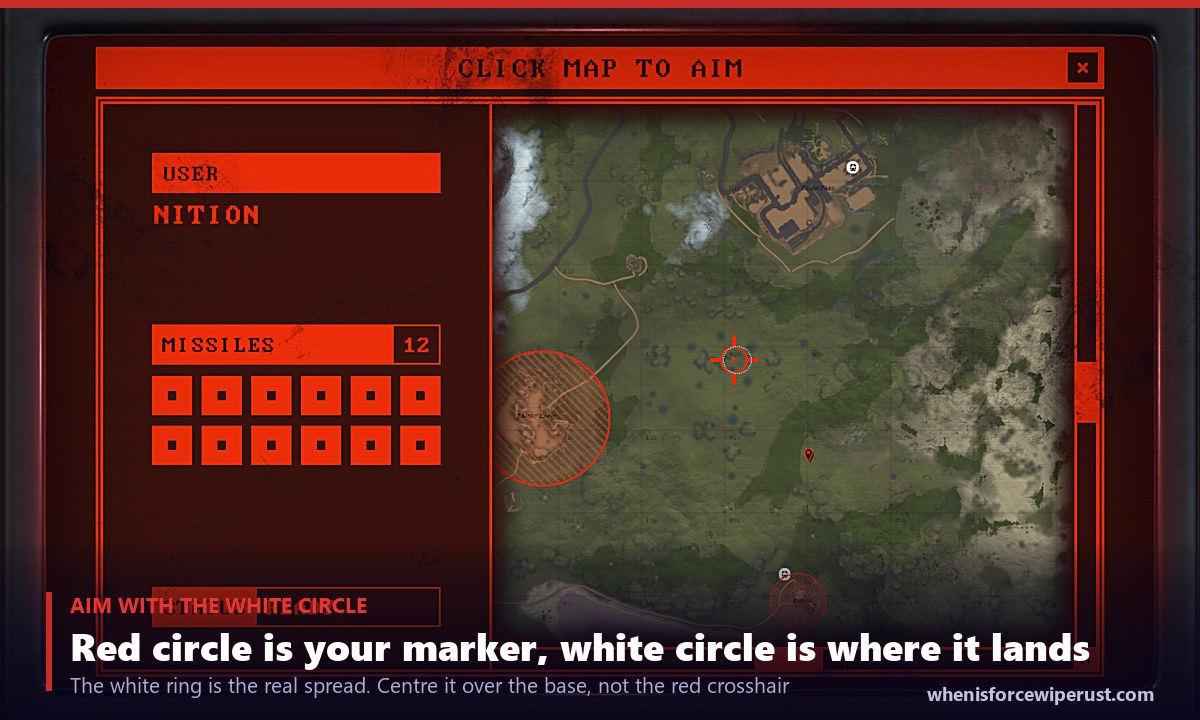
Aiming the MLRS is the part that decides whether a barrage flattens a base or lands in the ocean next to it. When you open the targeting screen you get two markers, and the difference between them is the single most important thing to understand about the weapon.
- The red circle is your target marker. It shows exactly where you clicked on the map.
- The white circle is where the rockets will actually impact. It is a spread, not a point, and it is deliberately larger than the red marker.
Aim with the white circle, not the red one. The MLRS is area fire, not a sniper. Your rockets scatter across the whole white ring, so you want that ring centred over the base you are hitting. If you obsess over the red crosshair and ignore the spread, half your barrage lands in the field next door.
How many MLRS rockets can you fire at once?
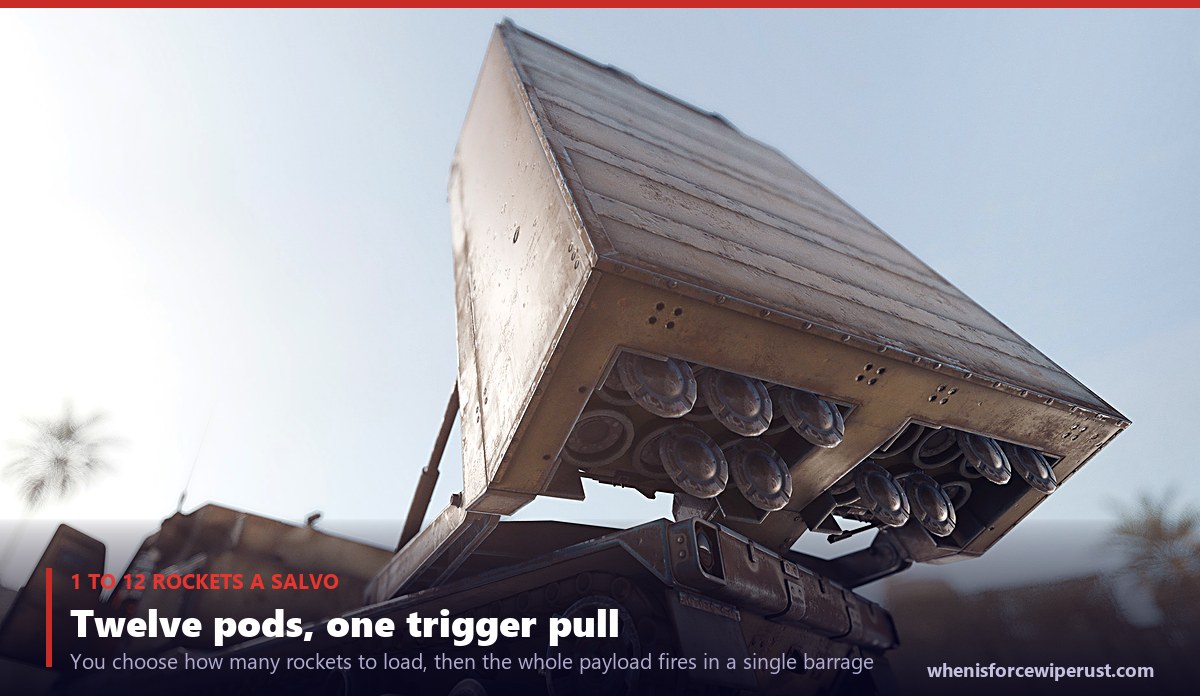
You can fire 1 to 12 MLRS Rockets in a single salvo. The launcher has twelve pods, and you decide how many to fill before you commit. Load three rockets and you fire three. Load twelve and the whole payload goes up in one barrage.
The number to actually load depends on the target, and this is where the 500 damage figure meets reality. A full 12 rocket barrage is 6,000 raw damage spread over a 15 metre area, which is enough to shred a wood or stone base and open several walls on a metal one. But because the rockets scatter across the white circle, you do not get to concentrate all twelve on one wall. That spread is exactly why the MLRS is better at cracking a base wide open than at drilling a single sheet metal wall.
MLRS cooldown: how long until it resets?
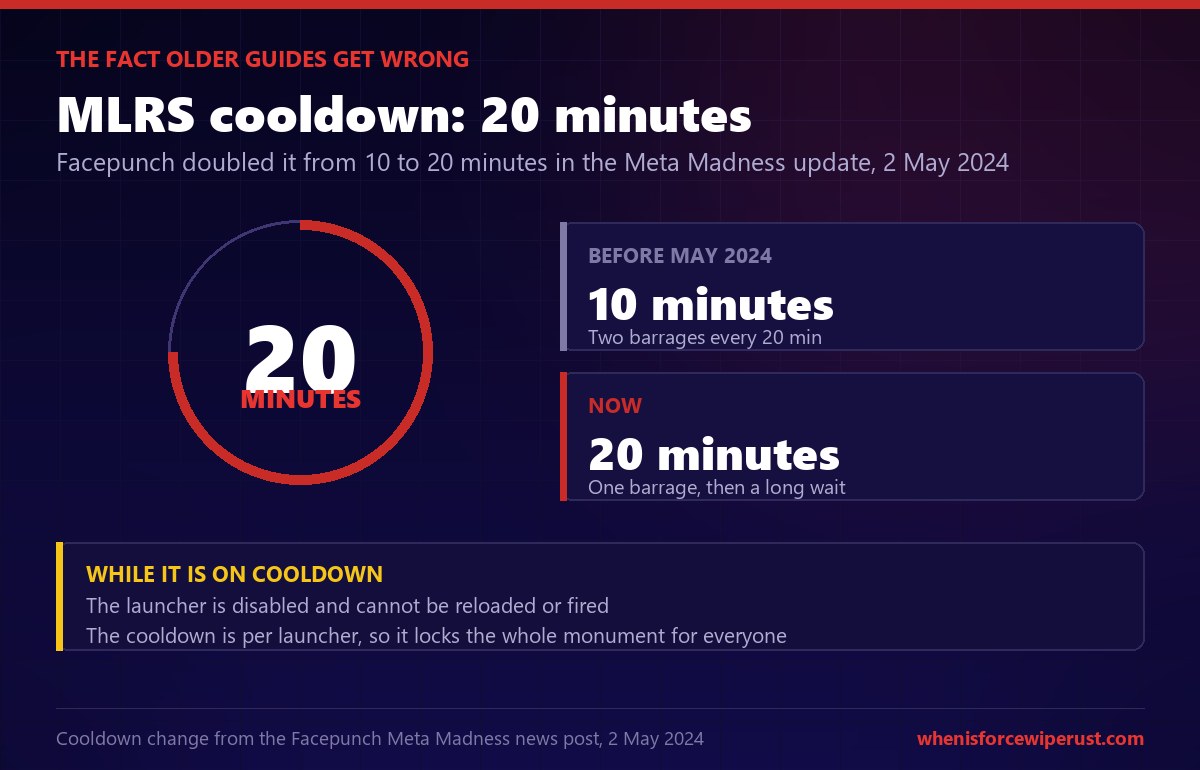
After you fire, the MLRS is disabled for 20 minutes. During that window the launcher cannot be reloaded or fired by anyone, and it sits there useless while the cooldown ticks down.
This is the number most MLRS guides on the internet still get wrong. For the first two and a half years of the weapon’s life the cooldown was 10 minutes. Facepunch doubled it to 20 minutes in the Meta Madness update on 2 May 2024, and a lot of older content never updated. If you read “10 minute cooldown” anywhere, that guide is out of date.
| Period | Cooldown | What it means |
|---|---|---|
| Before 2 May 2024 | 10 minutes | Two barrages inside 20 minutes if you had the modules |
| Now | 20 minutes | One barrage, then a long, exposed wait |
The cooldown is per launcher, and there is only one launcher on the map, so firing the MLRS locks the entire monument for everybody for 20 minutes. If a rival team beats you to it, you are waiting a third of an hour before you can even start your own run.
MLRS damage and what it takes to raid
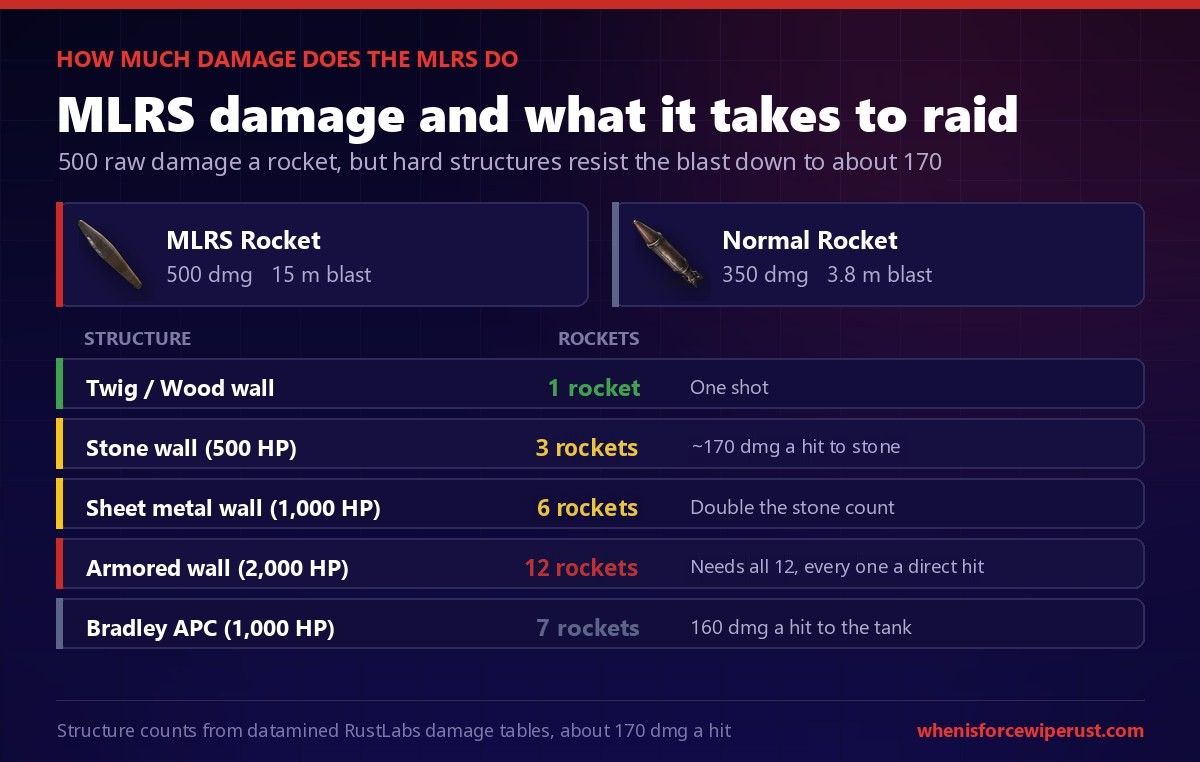
An MLRS rocket does 500 damage inside a 15 metre blast radius. On paper that dwarfs a standard rocket, which does 350 damage in a 3.8 metre radius. In practice the number that matters is not the raw 500, it is how much of that survives a structure’s blast resistance.
Against stone, sheet metal and high quality metal, a direct hit lands for roughly 170 damage. Those tiers have heavy explosive resistance, and the AoE gets soaked further the moment it is not a direct hit. Twig and wood, on the other hand, simply vanish under the first rocket.
| Target | Rockets to break | Notes |
|---|---|---|
| Twig / Wood wall | 1 | One direct hit destroys it |
| Stone wall (500 HP) | 3 | About 170 damage a direct hit |
| Sheet metal wall (1,000 HP) | 6 | Double the stone requirement |
| Armored wall (2,000 HP) | 12 | A full barrage, every rocket a direct hit |
| Bradley APC (1,000 HP) | 7 | 160 damage a hit to the tank |
Read that armored wall row again. It takes 12 rockets to break a single armored wall, a whole barrage with every rocket landing directly on that one wall, which the scatter almost never allows. That is the honest limit of the MLRS. It is superb at deleting wood and stone bases, decent at opening a metal base wide, and simply not the tool for punching a clean hole in armored tier. For that you still want C4, and you can always cross check exact counts in the Rust raid calculator.
How to counter and defend against the MLRS
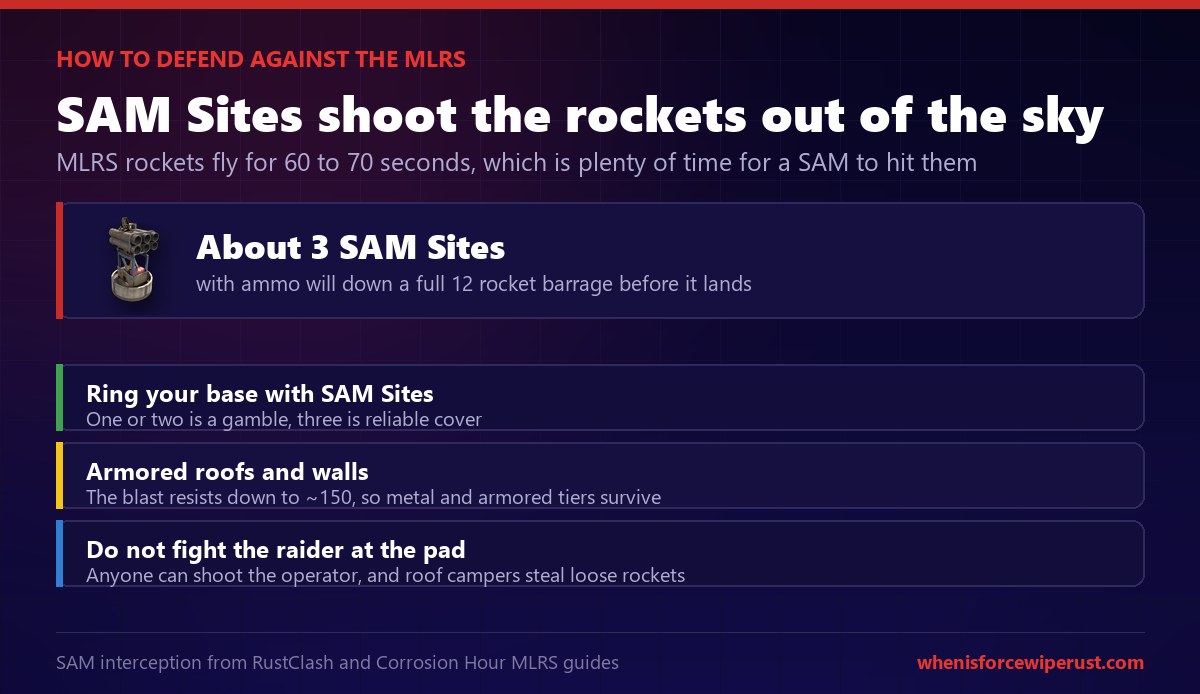
Here is the good news if you are on the receiving end. The MLRS has a hard counter that most bases can afford, and it is the reason serious groups barely fear it.
SAM Sites shoot the rockets down
MLRS rockets are treated as targetable projectiles, and a powered SAM Site will lock onto them and shoot them out of the sky. Because the rockets take 60 to 70 seconds to reach the target, a SAM has a long window to hit them. The rule of thumb is that about 3 SAM Sites with ammo will reliably down a full 12 rocket barrage before any of it lands.
One SAM is a gamble, two is decent, three is a wall. If your base sits inside three SAM coverage, an enemy who spends their entire wipe hoarding rockets and modules gets to watch their whole barrage detonate harmlessly in your airspace. That is the single best 500 scrap you can spend against artillery.
| Defence | How it helps |
|---|---|
| 3 SAM Sites | Shoots the whole barrage down mid flight, the only real answer |
| Armored roof and walls | Blast resists to about 170 a hit, so an armored wall needs all 12 rockets landing on it |
| Don’t stack loot up high | Keep valuables in a low, buried core the rockets cannot reach |
| Contest the launcher | Anyone can shoot the operator, so a defender can fight for the pad |
Is the MLRS worth it?
Now the part the flashy videos skip. Add up what a single MLRS barrage actually costs you and the weapon looks very different.
To fire once you need: up to 12 loot-only rockets that mostly come from beating Bradley, one loot-only aiming module that gets destroyed on the shot, a trip to a radiated monument you cannot fortify, and a 20 minute lockout afterwards. Against a hardened target, three SAM sites erase the entire thing. Against an armored core, a full barrage cannot even open one wall.
So when is the MLRS actually worth it?
- Wiping a wood or stone base off the map. Against low tier bases the MLRS is devastating and nearly unfair.
- Cracking a metal base open for a team push. A barrage that blows the roof and outer walls lets your squad flood in through the gaps.
- Psychological pressure. Nothing tilts a group like eating a barrage out of a clear sky with no idea who sent it.
- You already beat Bradley anyway. If the rockets are a byproduct of your Launch Site runs and you happen to have a module, a free barrage is a free barrage.
When is it not worth it? Any time the target has SAM coverage, any time the target is armored, and any time the wipe is nearly over. For most raids, the sulfur you would spend getting to the launcher is better spent on C4 and a plan.
MLRS rockets, modules and every base on the map reset on force wipe. Know exactly how long you have before the artillery, and everything else, starts over.
Check the next Rust force wipeMLRS Rust FAQ
What is the MLRS in Rust?
Where is the MLRS in Rust?
How do you use the MLRS in Rust?
How do you aim the MLRS?
How many MLRS rockets can you fire at once?
How long is the MLRS cooldown in Rust?
How do you get MLRS rockets in Rust?
Can you craft MLRS rockets?
How do you get the MLRS Aiming Module?
Does the aiming module get used up?
How much damage does the MLRS do?
How many MLRS rockets to break a wall?
How long do MLRS rockets take to land?
How do you counter the MLRS?
Can you drive the MLRS in Rust?
Is the MLRS worth it in Rust?
Sources
- Facepunch news post MLRS and Desert Base update, 4 November 2021, for the launcher’s release, the Desert Military Base monument and the in game screenshots used on this page.
- Facepunch news post Meta Madness, 2 May 2024, for the cooldown increase from 10 minutes to 20 minutes.
- RustClash Rust Wiki entity page for the MLRS, for the 1 to 12 rocket capacity, the static vehicle behaviour and the firing steps.
- RustClash Rust Wiki item page for the MLRS Rocket, for the 500 damage, 15 metre blast radius, 60 to 70 second flight time, drop sources and drop rates, shortname and stack size.
- Corrosion Hour, RUST MLRS Guide, for the aiming module mechanics, the red versus white targeting circles, the SAM Site counter and the structural damage figures.
- Corrosion Hour item pages for the MLRS Rocket and MLRS Aiming Module, for loot sources, the consumed-on-use behaviour and recycle output.
- The whenisforcewiperust.com Rust raid calculator and Bradley APC guide, for cross checking explosive damage and the MLRS rocket drop from Bradley crates.